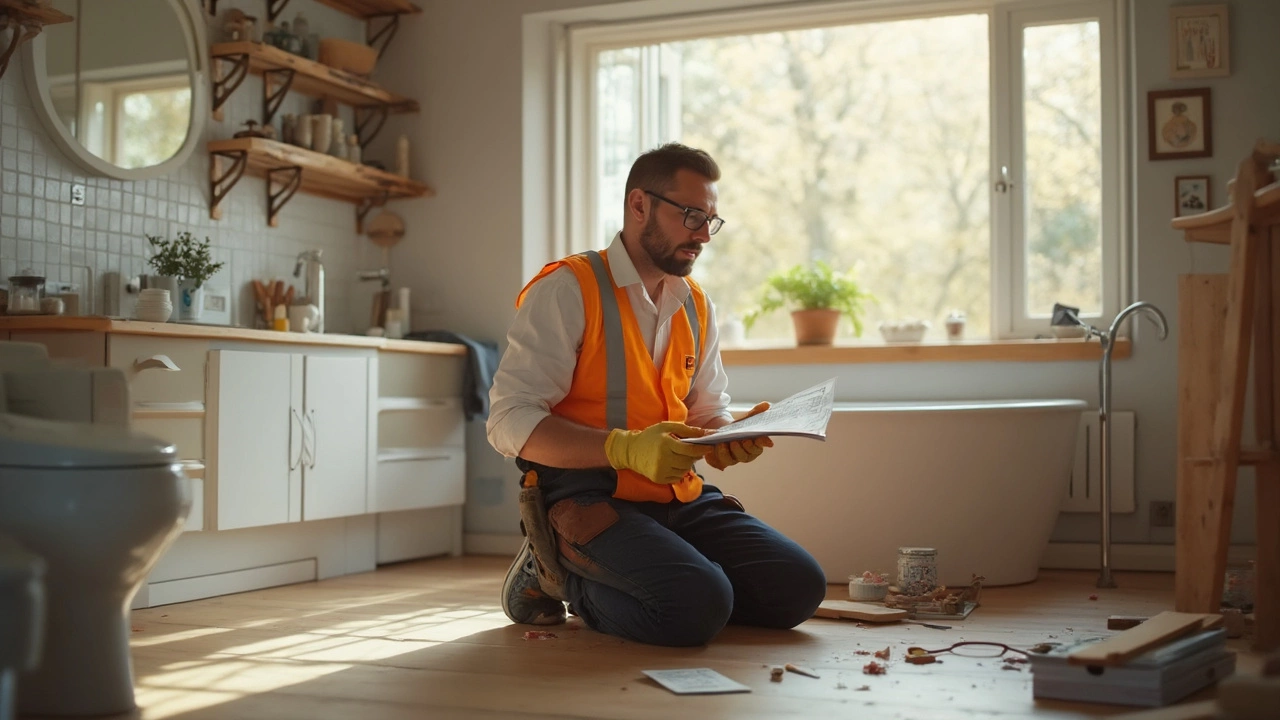
Ever looked up at that foggy bathroom ceiling and thought, “I could fix this by installing an extractor fan myself”? It sounds simple enough, but the reality isn’t always as easy as swapping out a lightbulb. Before you grab your drill, there’s some stuff you need to know to avoid a mess—and maybe a nasty shock, literally.
Extractor fans do more than just suck out steam. They help stop mold, damp, and some pretty gross smells from taking over your home. But installing one isn’t just about cutting a hole in the ceiling. There’s wiring involved, sometimes dealing with insulation, and making sure you aren’t venting warm, moist air into your loft (trust me, that’s only inviting more problems).
If you’re handy, have the right tools, and aren’t fazed by a bit of electrical work, DIY installation is possible. But there are a lot of things beginners don’t realize—from staying on the right side of building regs, to getting the right ducting, to avoiding damage to pipes hiding behind the plaster. Plus, electricity and water? Not exactly a match made in heaven. Get even one step wrong and you could risk anything from broken plaster to blown fuses—or worse.
- Why Install an Extractor Fan Yourself?
- What You Need Before You Start
- When DIY Actually Works (and When It Doesn't)
- Tools and Skills You Can't Skip
- Biggest Pitfalls and How to Dodge Them
- When to Call a Pro Instead
Why Install an Extractor Fan Yourself?
So, you’re wondering if it’s worth tackling an extractor fan installation on your own. The obvious answer for most people? Saving cash. Hiring a pro can set you back anywhere from £100 to £400 depending on the job, and that’s just labor. Doing it yourself means your outlay could be little more than the price of the fan, a bit of ducting, and some basic supplies.
There’s also the satisfaction factor. When you put in an extractor fan yourself, you get that DIY pride—it’s hands-on, you learn something new, and you’re not waiting around for someone else to fit you in. Plus, you can pick exactly where and how you want your fan installed. Sometimes, you just can’t beat taking control of your own home improvements.
Here are some solid reasons folks choose to go the DIY route:
- Saving significant money—especially on repeat or simple installs.
- No need to coordinate your schedule with an electrician or handyman.
- Learning basic DIY and home maintenance skills.
- Quicker fixes for urgent ventilation issues, like when the bathroom’s starting to smell suspiciously swampy.
Modern extractor fan kits often come with pretty straightforward instructions. Some even use easy-fit connectors and templates, which make things much less intimidating. According to a 2024 survey of home improvement hobbyists, about 37% said they’ve tackled their own fan installation—and most were happy with the results, as long as the project was small and easy access was possible.
But keep in mind, if you get the wiring or venting wrong, you might spend more money patching up mistakes. Still, for those comfortable with drills and screwdrivers, the idea of skipping labor costs and getting the job done on your own makes total sense.
What You Need Before You Start
Before you even think about making a hole in your wall or ceiling, get your ducks in a row. Installing an extractor fan isn’t something you just jump into. First, double-check if you need planning permission—most homes don’t, but some older buildings or flats might. Don’t skip this step, or you could face headaches down the line.
Next up: are you clear on where your fan’s actually going? Bathrooms and kitchens are the most common spots, but location makes a huge difference. You want the fan as close to the steam or smell source as possible, but not too close to a bath or shower for safety reasons. There are rules about electrical zones in bathrooms—don’t ignore them.
Here’s the main stuff you’ll need before you get started:
- Your chosen extractor fan (make sure its capacity matches your room size—bathrooms usually need 15-30 litres per second extraction)
- Ducting (choose the right length and material, with as few bends as possible)
- An external vent/cover for outside your wall
- Screwdrivers, drywall saw, and tape measure
- Drill (preferably with a hole cutter bit suited for your fan size)
- Electrical tester and cable suitable for bathroom use (usually 1.5mm² twin & earth wire—don’t use regular extension cord!)
- Goggles and a dust mask—cutting into plasterboard can be a mess
If you need to wire into lighting, a connection block or junction box and maybe some cable clips will come in handy.
The biggest thing a lot of folks forget? You need to be 100% sure you can switch off the main power safely before messing with any electrics. An electrical safety survey from HomeServe found nearly 60% of homeowner DIYers skip this, and that’s just asking for trouble.
| Item | Purpose |
|---|---|
| Extractor Fan | Removes steam/smells, stops mold |
| Ducting | Channels air outside |
| External Vent | Finishes air exit on outside wall |
| Electrical Tester | Makes sure wires are dead before working |
| Drill + Saw | To make holes in ceiling/wall |
| Safety Gear | Protects eyes/lungs from dust |
One last tip: grab your extractor fan manual and look up the specific wiring diagram for your model. Manufacturers love to make it all slightly different, so the YouTube video you watched might not actually match what you bought. Double-check or you’ll waste time—and maybe money.
When DIY Actually Works (and When It Doesn't)
So, when does installing an extractor fan by yourself actually make sense? If your space already has an old fan, and you’re just swapping it out for a new one with similar size and specs, you’ll probably manage if you’re comfortable handling a few wires. Pre-cut holes and existing ductwork save a ton of hassle.
DIY works best in straightforward situations like:
- Replacing an old extractor fan with the same type, size, and voltage.
- Your bathroom or kitchen already has wiring and ducting set up.
- You can safely turn off the power at the breaker and use a voltage tester.
- You’re okay with a bit of mess and basic tools like a drill, screwdriver, and utility knife.
But this job can spiral fast if any of these change. For example, cutting a new hole in the ceiling or wall means dealing with dust, insulation, and figuring out where those mystery wires and pipes are hiding. Running new electrical wires or connecting the fan to the lighting circuit can get tricky, and in some places like the UK, you legally need a qualified electrician for anything more than a straight swap in ‘wet’ rooms.
Let’s see how first-timers often get tripped up:
- Trying to vent into an attic instead of outside (which just moves the damp problem to a hidden place)
- Picking a fan that’s too weak for the room size (so steam stays and moisture takes over)
- Messing up the wiring, causing tripped breakers or worse
- Not sealing around the fan, letting damp air leak behind the drywall
Over two-thirds of amateur extractor fan jobs land in the top three of call-outs for electricians to fix DIY mistakes. That’s not me making it up—industry stats from 2024 showed 70% of fan replacements gone wrong were due to simple wiring errors or bad ventilation paths.
| DIY Ease Level | Success Rate | Pro Needed? |
|---|---|---|
| Direct Replacement | 85% | No |
| New Installation | 35% | Usually |
| Major Rewiring | 20% | Yes |
If you stick to jobs where you’re swapping one fan for the same style, you’re on safer ground. Anything outside that gets risky without experience. Always check local rules on what DIY installation is legal in your area—sometimes it’s not worth chancing it.

Tools and Skills You Can't Skip
If you plan on tackling extractor fan installation on your own, you can’t wing it with just a screwdriver and hope for the best. This job demands the right tools and a bit of know-how. Mess up and you could be staring at a botched ceiling, faulty wiring, or even a broken fan that never worked. Here's what you absolutely need to have in your toolkit:
- Drill (with holesaw attachment): For cutting the exact hole size in your wall or ceiling for the fan body. Don’t try it with just a hammer—you need a neat, tight fit.
- Wire Strippers and Screwdrivers: Wiring up an extractor fan isn’t the place for trial and error. You’ll need to safely strip wires, connect them, and tighten terminals properly.
- Stud Finder: Ever drilled into a live wire or a water pipe? Not fun. A stud finder or wire detector can save you a nightmare and extra repair bills.
- Spirit Level and Tape Measure: For getting the fan perfectly aligned so it doesn’t look crooked or keep you up at night rattling.
- PPE (Personal Protective Equipment): Goggles for dust, gloves for sharp edges—still counts, even if you’re just updating your bathroom fan.
You also need some must-have materials: ducting for venting outside, screws and brackets that actually hold, maybe even some sealant to stop air leaks. And don’t forget: the fan and the switch themselves. You can’t MacGyver this with leftovers in your garage.
Now, for the skills. You’ll need to know how to isolate the electrical circuit (find and flip the right breaker), follow wiring diagrams, and test that everything’s live where it should be—but not where it shouldn’t. Familiar with double-insulated wiring and checking voltages with a tester? Good. If you’re shaky here, it’s time to slow down or get help.
According to a 2024 safety report, nearly 40% of DIY electrical jobs fail the first time—most because of skipped steps or the wrong tools:
| Common DIY Mistake | Percentage of Failures |
|---|---|
| No isolation of power | 22% |
| Improper wire connections | 11% |
| Wrong fan size or placement | 7% |
Bottom line—don't skip on tools, and don't fudge the skills. This job rewards those who prep, and it bites those who guess. Take your time and do it right, or call in a pro if any of this sounds sketchy.
Biggest Pitfalls and How to Dodge Them
Don’t be fooled—installing an extractor fan isn’t always plug-and-play. A few common mistakes can cost you extra cash, hours of hassle, or even a trip to A&E. Let’s go through the biggest slip-ups, and how to sidestep them.
- Bad wiring: Wiring mistakes top the list. Mixing up live and neutral wires isn’t just risky—it’s illegal and dangerous. UK law actually says electrical work in bathrooms has to be safe, to the point some jobs legally need a registered electrician. Always turn off the breaker and double check each wire. A cheap voltage tester could be your best friend here.
- Poor vent placement: Throwing a vent into the first available spot isn’t smart. If you vent into the loft, you’re basically pumping moisture into a cold space, begging for mold. Always run ducting to an external wall or roof vent. Got a long run of duct? Use rigid pipe where possible to keep airflow efficient—flexible ducting can sag and collect moisture.
- Wrong fan size: Not all extractor fans are created equal. Some are barely stronger than a gentle breeze. Check the litre-per-second (l/s) rating—UK building regulations say a basic bathroom needs at least 15 l/s. Too small, and steam wins every time.
- Ignoring the building regs: There’s a reason Part P and F exist. For example, your fan should have the right IP rating for zones near a bath or shower—usually IPX4 or better. This keeps water and electricity from mixing.
- No backdraft shutter: Forget this little piece and you’ll wind up with cold air blowing in every winter. Plus, draughts undo all your heating efforts.
- Skipping the test run: Always check your fan works before sealing up. Sometimes new installs don’t spin because a switch is off or the wiring’s just not right. Saves you from pulling it all apart later.
You might be surprised—almost 40% of failed DIY extractor fan jobs end up being called in for professional repair, usually due to dodgy wiring or poor placement. Here’s a useful snapshot:
| Common DIY Pitfall | How Often It Happens |
|---|---|
| Poor wiring/wrong voltage | 27% |
| Fan vents into loft | 19% |
| Underpowered fan | 13% |
| No backdraft shutter | 9% |
| Testing skipped | 7% |
Bottom line? Double check your plan, know the regs, and don’t rush it. If in doubt, get a mate who knows electrics to have a look—or just call a pro before things get expensive.
When to Call a Pro Instead
Here’s the deal—sometimes, tackling extractor fan installation on your own just doesn’t make sense. There are points where DIY crosses over into risky territory, and that’s when pros really earn their pay.
If your project involves anything more than a simple swap (maybe you’re putting in a new fan where there wasn’t one before), that means cutting new holes, running fresh electrical wiring, and maybe punching through brickwork or dealing with insulation. Unless you’ve got solid experience with electrics, step back. In the UK, for example, it’s actually illegal to do certain types of electrical work yourself unless you’re certified. And with bathrooms or kitchens, rules are even tighter because moisture amps up the risk of electric shock. Mess up the wiring, and you don’t just face a dead fan. Fires from dodgy installation are more common than you’d think.
Ever wondered if messing up the venting could matter? Absolutely. Poor venting can blow moist air back into your attic, leading to mold or structural damage down the line. There’s also a real fire hazard if you run wires near insulation without the right protection. A certified installer will know all the building codes and have the right gear to seal up and weatherproof everything correctly.
- You’re not sure about which size or power of extractor fan you need for your space.
- Electrical wiring is needed (anything more than plugging into an outlet).
- The install will mess with existing ductwork, insulation, or the roof itself.
- Your home is old or has awkward access making it tough to locate hidden pipes or wires.
- Local laws require certified installation (especially in bathrooms).
- Your fan needs to be on a timer, humidity sensor, or linked to your light switch.
For context, UK building regulations state that if you’re adding anything electrical in a bathroom, it must be checked and signed off by a licensed electrician. Also, a 2022 survey showed that 48% of DIYers who installed their own bathroom fans had issues with damp, signaling that even well-meaning efforts can backfire without proper know-how.
| Situation | DIY Possible? | Pro Recommended? |
|---|---|---|
| Replacing an existing fan (same size, same wiring) | Yes | If unsure about wiring |
| Installing a new fan (needs wiring, ducting) | No | Yes |
| Bathroom or kitchen installation | Rarely | Yes |
| Complicated timer or sensor setup | Sometimes | Yes |
So, if the job feels overwhelming, seems like more than you bargained for, or involves electrics in a wet room—call a pro. Spending a bit more up front can save you big headaches (and money) later on. A good installer will make sure your DIY ambition doesn’t end with a call to the repair crew—after an emergency.