Kitchen Extractor Fan Size Calculator
Enter Kitchen Dimensions
Why This Matters
A properly sized extractor fan prevents mold growth and maintains air quality. The article shows that:
- Small kitchens (≤12m²) need 180 L/s airflow
- Medium kitchens (12-18m²) need 250 L/s
- Large kitchens (>18m²) need 300 L/s
Warning: Always match existing duct size (typically 150mm or 200mm diameter).
Recommended Size: Enter dimensions to see results
Most kitchen extractor fans fail not with a bang, but with a slow, annoying hum that won’t quit. The grease buildup, the rattling blades, the smell that lingers even after you’ve cleaned the filters - it’s enough to make you want to just rip it out and start over. But before you call a tradesperson, ask yourself: can I replace a kitchen extractor fan myself? The answer is yes - if you’re comfortable with basic tools, understand your home’s electrical setup, and follow safety steps. Many homeowners in Wellington and across New Zealand do it every week, saving hundreds of dollars and gaining confidence in their home’s systems.
What You’re Really Replacing
You’re not just swapping a fan. You’re replacing a ventilation system that pulls steam, smoke, grease, and odors out of your kitchen. A working extractor fan prevents mold, protects your cabinetry from moisture damage, and keeps your air clean. Most units installed in homes built after 2000 are either 150mm or 200mm in diameter, with a duct running to the outside wall or roof. Older models might be smaller or even recirculating (no duct), but those are rare now.
The fan motor usually lasts 5-10 years. If yours is older than that, or if it’s making grinding noises, vibrating badly, or won’t turn on even after replacing the fuse, it’s time. You don’t need to replace the whole hood unless it’s cracked or rusted. Most of the time, just the fan unit inside the housing needs swapping.
Tools and Parts You’ll Need
Before you start, gather everything. You’ll be working in a tight space, often above the stove, so having tools ready saves time and frustration. Here’s what you need:
- New extractor fan unit (match size and wattage - check the old one’s label)
- Phillips screwdriver and flathead screwdriver
- Wire strippers and electrical tape
- Non-contact voltage tester
- Measuring tape
- Masking tape and a marker
- Work gloves and safety glasses
- Optional: duct tape or aluminum foil tape for sealing the duct
Don’t buy a generic fan. Get the exact model or one that matches the dimensions and airflow (measured in litres per second or L/s). A 150mm fan with 180 L/s airflow is standard for most Kiwi kitchens. Brands like Zephyr, Extracto, or Vent-Axia are common. Check your old fan’s model number - it’s usually printed on a sticker on the side or back.
Step 1: Turn Off the Power
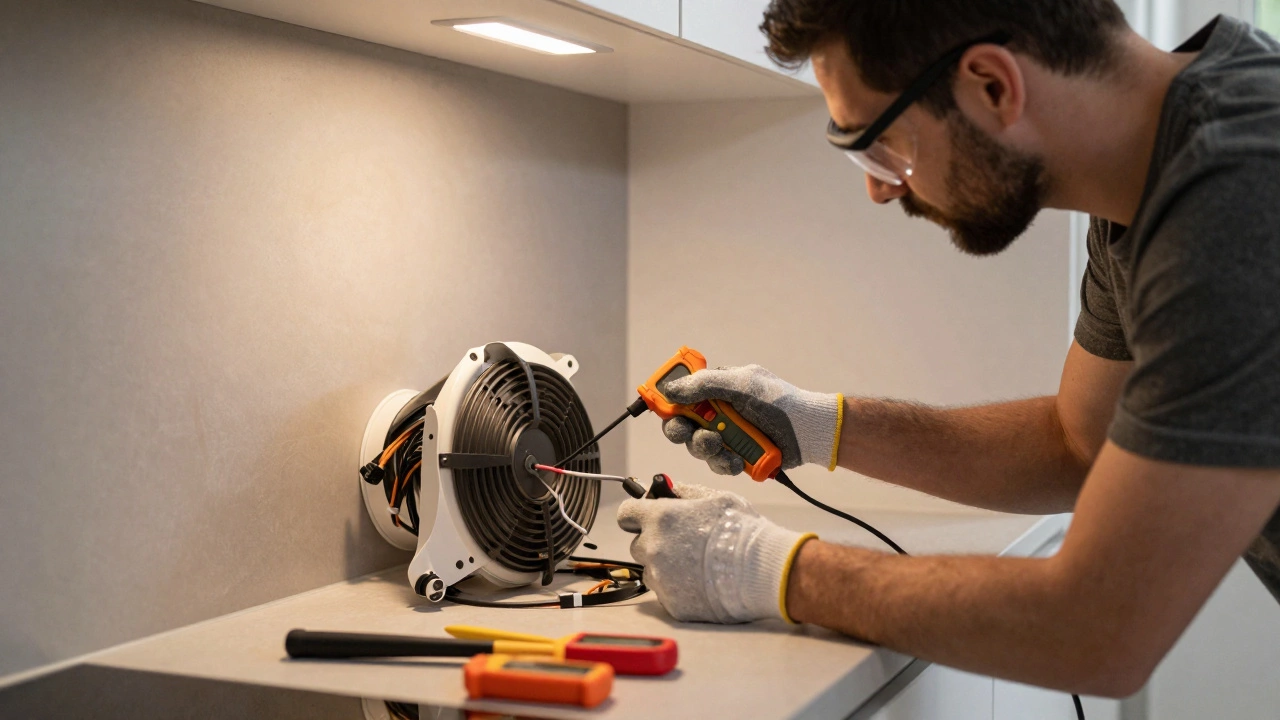
This is non-negotiable. Even if the switch is off, the wires behind the wall might still be live. Go to your switchboard and turn off the circuit breaker that powers the kitchen. If you’re unsure which one, turn off the main breaker. Use your non-contact voltage tester on the wires after you remove the cover - it should beep only if there’s live current. If it beeps, you didn’t turn off the right breaker. Keep checking until it’s silent.
Once you’re sure the power is off, tape the switch in the off position with masking tape. This prevents someone from accidentally turning it back on while you’re working.
Step 2: Remove the Old Fan
Most extractor fans are held in place by two or four screws from the underside of the housing. Use your screwdriver to remove them. Some units are clipped into place - gently pry them loose with a flathead screwdriver. Don’t force it. If the fan is stuck with grease or paint, use a utility knife to carefully cut through the sealant around the edges.
Once the screws are out, pull the unit down slowly. You’ll see wires connected with wire nuts or terminal blocks. Take a photo with your phone before disconnecting anything. Label each wire with masking tape - live (brown), neutral (blue), earth (green/yellow). If your old fan had a separate switch or timer, note how those wires were connected too.
Next, disconnect the duct. It’s usually held with a metal clamp or zip ties. Loosen it and pull the duct away. You might find grease buildup inside - clean it out with a rag and soapy water. A clogged duct is why many fans fail prematurely.
Step 3: Install the New Fan
Take your new fan and compare it to the old one. Does it fit the same space? Are the mounting holes aligned? If it’s slightly smaller, you may need to use spacers or extra screws. If it’s larger, you might need to cut the housing - but that’s rare. Most replacements are designed as direct swaps.
Connect the wires the same way you saw on the old one. Match colors: brown to brown, blue to blue, green/yellow to earth. Twist the wires together tightly, then secure them with wire nuts. Wrap each connection with electrical tape for extra safety. Don’t just rely on the wire nuts - tape adds a layer of protection against moisture and vibration.
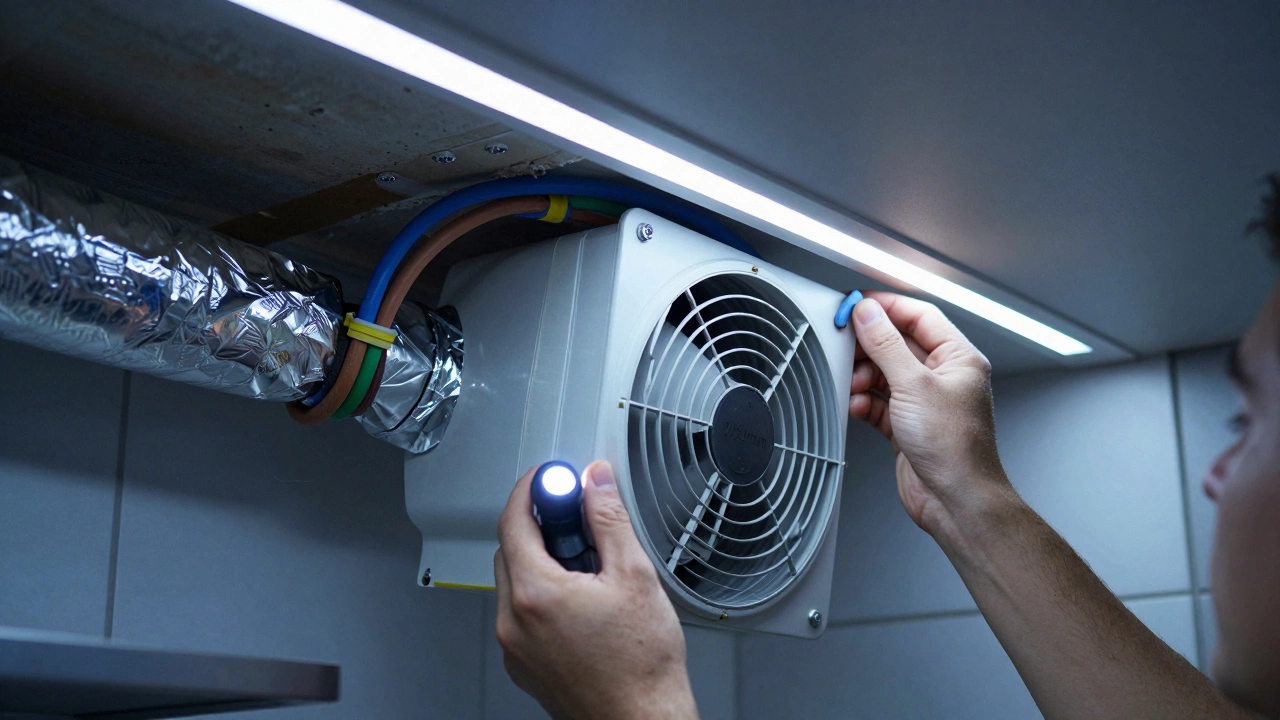
Reattach the duct. Use aluminum foil tape, not regular duct tape. Foil tape withstands heat and doesn’t degrade over time. Wrap it snugly around the joint where the duct meets the fan. A leak here means your fan won’t work properly - air will escape into the ceiling instead of going outside.
Step 4: Mount and Test
Hold the new fan in place and reattach the screws. Don’t overtighten - plastic housings can crack. Make sure the fan sits flush and doesn’t wobble. Once it’s secure, turn the power back on at the switchboard.
Flip the switch. You should hear a smooth hum, not a buzz or rattle. If it doesn’t start, turn the power off again and check your wiring. If it runs but sounds loud, the duct might be kinked or the fan isn’t seated properly. If it runs fine, let it run for 10 minutes. Check the outside vent - air should be pushing out. If not, there’s a blockage or a leak.
When You Should Call a Professional
There are cases where DIY isn’t safe or smart:
- Your home has older wiring without an earth wire - this is common in houses built before 1980.
- The fan is wired through a wall switch that also controls other circuits - you might be dealing with a multi-way switch setup.
- You’re not sure which breaker controls the fan, and you don’t feel comfortable testing circuits.
- The duct runs through the roof or a cavity wall - accessing it requires removing ceiling panels or roof tiles.
- You live in a rental property - your lease might require professional repairs.
If any of these apply, call a licensed electrician. It’s not worth the risk. A bad connection can cause a fire, and insurance might not cover damage from unlicensed work.
Cost Comparison: DIY vs Professional
A new extractor fan unit costs between $80 and $200, depending on airflow and features like lighting or timers. A professional installation in Wellington typically runs $250-$400, including labor and materials. That’s a $150-$300 saving if you do it yourself.
But remember: if you mess up the wiring and cause a short, you could end up paying more in repairs or insurance claims. Take your time. Double-check every connection. If you’re even a little unsure, stop and call someone.
Pro Tips for a Smooth Replacement
- Buy the fan before you remove the old one. That way, you know it fits.
- Take photos at every step - especially wiring. You’ll thank yourself later.
- Use a small flashlight. The space behind the fan is dark and cramped.
- If your new fan has a timer or humidity sensor, follow the manual. Some need calibration.
- Replace the grease filter at the same time. They’re cheap and improve performance.
Most people who do this replacement say the hardest part is getting the old fan out. Once it’s loose, the rest is straightforward. With a little care, you’ll have a quiet, efficient fan that lasts another decade.
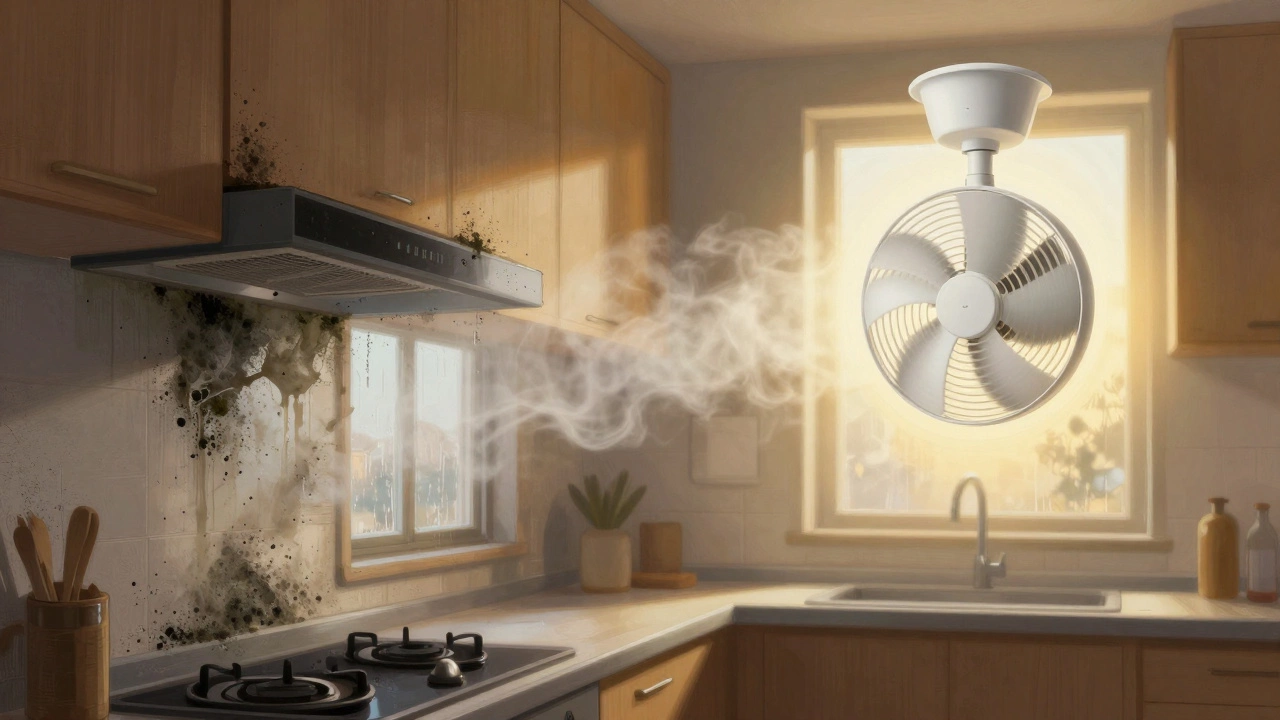
What Happens If You Don’t Replace It?
Ignoring a broken extractor fan isn’t just about smells. Moisture builds up. Condensation forms on windows and walls. Over time, that leads to black mold - especially in corners and behind cabinets. In Wellington’s damp climate, mold growth can happen in as little as 3 months without proper ventilation.
Studies show that kitchens without extractor fans have 5-10 times higher levels of airborne pollutants. That includes fine particles from cooking oil and gases like nitrogen dioxide from gas stoves. Long-term exposure can affect breathing, especially for kids and elderly people.
Replacing the fan isn’t just a fix - it’s a health decision.
Can I replace my kitchen extractor fan without turning off the power?
No. Never work on electrical fixtures without turning off the power at the switchboard. Even if the switch is off, live wires may still be connected behind the wall. Using a non-contact voltage tester is the only safe way to confirm the circuit is dead. Skipping this step risks electric shock or fire.
How do I know what size fan to buy?
Measure the opening in your ceiling or wall where the fan sits - most are either 150mm or 200mm in diameter. Check the airflow rating (L/s) on the old fan’s label. A 150mm fan with 180 L/s is standard for most homes. Don’t just pick the cheapest one - make sure the new fan matches the size and airflow of the old one. A weaker fan won’t remove steam effectively.
Do I need to replace the duct too?
Not always. If the duct is intact, clean, and not crushed or kinked, you can reuse it. But if it’s full of grease, cracked, or made of flexible plastic (which traps moisture), replace it with rigid aluminum ducting. Rigid ducts move air better and are easier to clean. Use foil tape, not duct tape, to seal joints.
Why is my new fan noisy after installation?
A noisy fan usually means it’s not sitting flat, the duct is bent, or the mounting screws are too tight. Check that the fan is level and the housing isn’t warped. Make sure the duct isn’t pinched or sagging. Also, some fans come with vibration pads - if yours didn’t, you can buy rubber grommets to reduce noise. A little hum is normal, but rattling or buzzing isn’t.
Can I install a fan where there wasn’t one before?
It’s possible, but more complex. You’ll need to cut a hole in the ceiling or wall, run ducting to the outside, and wire it to a power source. This often requires building consent in New Zealand, especially if you’re cutting through a roof or exterior wall. For new installations, it’s best to hire a licensed electrician and builder to ensure compliance with building codes.