
Oven Heating Element Diagnostic Tool
Instructions: Follow the steps below to determine if your oven element needs replacement. Start by ensuring safety, then proceed through visual and electrical tests.
Before inspecting or testing, you must ensure there is no live electricity flowing to the oven to prevent severe shock.
Your dinner is ready, but your oven refuses to get hot. You turn the dial, wait an hour, and the inside remains lukewarm at best. It’s frustrating, especially when you’re hungry or hosting guests. Before you call a technician for a potentially expensive visit, consider this: the problem might just be a burnt-out heating element, a common wear-and-tear part in every electric oven. Replacing it yourself can save you hundreds of dollars and get your kitchen back up and running in under an hour.
Knowing whether the element is actually dead-or if the issue lies with a thermostat, control board, or wiring-saves you from buying unnecessary parts. This guide walks you through the visual signs, simple tests, and safety steps to diagnose a faulty element accurately.
The Quick Summary: Key Takeaways
- Visual Inspection First: Look for blisters, holes, or glowing red spots that don’t spread evenly. A healthy element glows uniformly; a bad one often stays dark or burns out in patches.
- The Multimeter Test Is Definitive: Continuity testing reveals if electricity flows through the element. No reading means the internal coil is broken.
- Safety Comes First: Always unplug the oven or switch off the circuit breaker before touching any internal components to avoid severe electric shock.
- Not All Heat Losses Are Element Faults: If the element looks fine and has continuity, check the thermal fuse, relay board, or temperature sensor next.
- Replacement Is DIY-Friendly: Most elements are held by two screws. Match the wattage and shape exactly when buying a new one.
Signs Your Heating Element Has Failed
You don’t always need tools to spot a bad element. Often, the symptoms are obvious once you know what to look for. Start by observing how the oven behaves during use.
Uneven Heating is a classic warning sign. If your roast is charred on one side and raw on the other, the top or bottom element may be partially failed. In many ovens, the top element handles broiling while the bottom handles baking. If only one function fails, isolate which element is acting up.
No Heat At All suggests a total failure. If the fan runs but the air isn’t warm, the main bake element is likely dead. Conversely, if the oven heats slowly but never reaches the set temperature, the element might be weak rather than completely broken.
Visible Damage includes cracks, blisters, or burn marks on the metal coil. Over time, thermal cycling (heating up and cooling down) causes the metal to expand and contract. Eventually, it fatigues. You might see small holes where the coil has burned through. Sometimes, you’ll notice a faint burning smell even when the oven is clean-this is insulation breaking down around a failing element.
Intermittent Operation can also point to a loose connection rather than a dead element. If the oven works sometimes and not others, wiggle the wires gently (with power off!) to see if contact is lost. But if the element itself is cracked, no amount of wiggling will fix it.
Performing a Visual Inspection Safely
Before grabbing any tools, do a thorough visual check. This step requires no disassembly and gives you immediate clues.
- Unplug the Oven: Safety is non-negotiable. Pull the plug from the wall outlet. If your oven is hardwired, switch off the dedicated circuit breaker in your electrical panel.
- Open the Door and Look Inside: Use a flashlight to inspect both the top (broil) and bottom (bake) elements. Clean ovens make this easier, so wipe away grease if needed.
- Check for Physical Damage: Look closely at the spiral coil. Healthy elements have a smooth, uniform surface. Damaged ones show bulges, breaks, or discoloration. Pay attention to the ends where wires connect-loose terminals can cause arcing.
- Observe During Operation (Optional): If you’re unsure, plug the oven back in briefly. Set it to "Bake" at 350°F (175°C). Watch the bottom element. It should glow bright orange-red within minutes. If it stays black or only parts glow, unplug immediately-the element is failing.
Note: Some modern ovens have hidden elements behind panels. If yours does, skip the visual check and move directly to testing.
Testing for Continuity With a Multimeter
A visual inspection isn’t enough. The most reliable way to confirm a bad element is testing for electrical continuity. This checks if current can flow from one end of the element to the other.
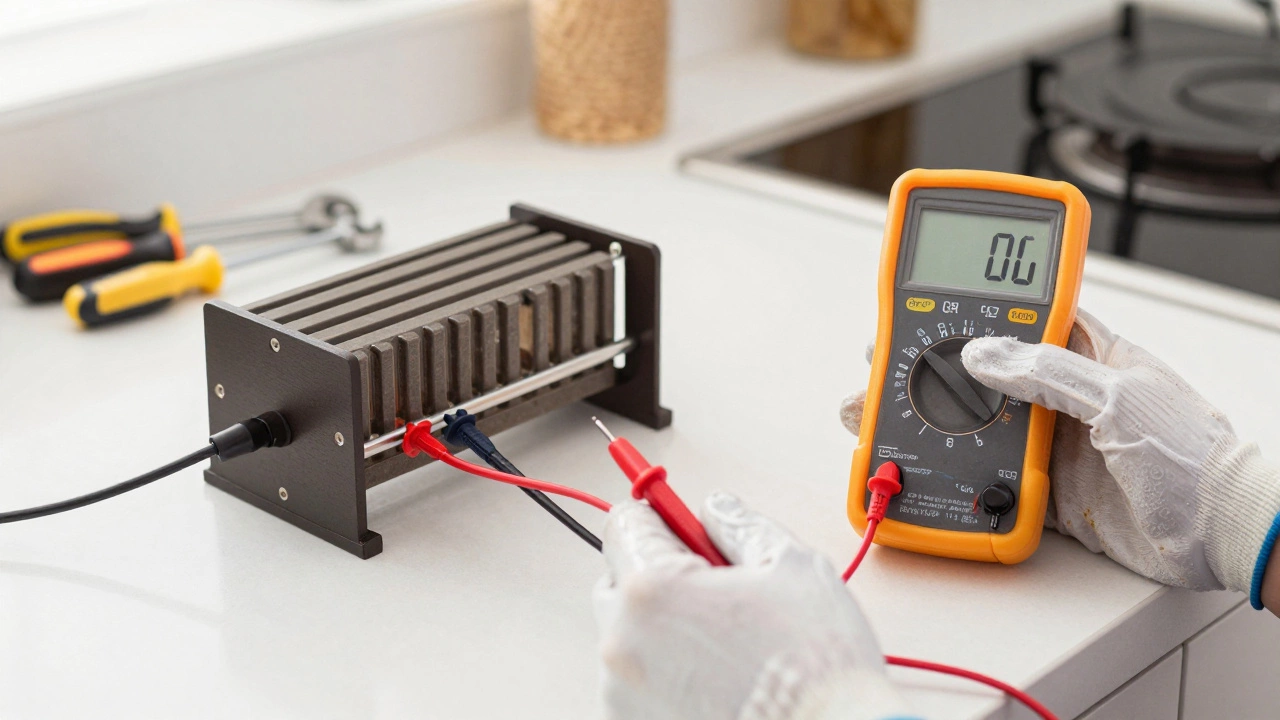
You’ll need a basic digital multimeter, available at any hardware store for under $20. Here’s how to proceed:
- Disconnect Power Completely: Ensure the oven is unplugged or the breaker is off. Double-check by trying to turn on the oven lights-if they work, power is still present.
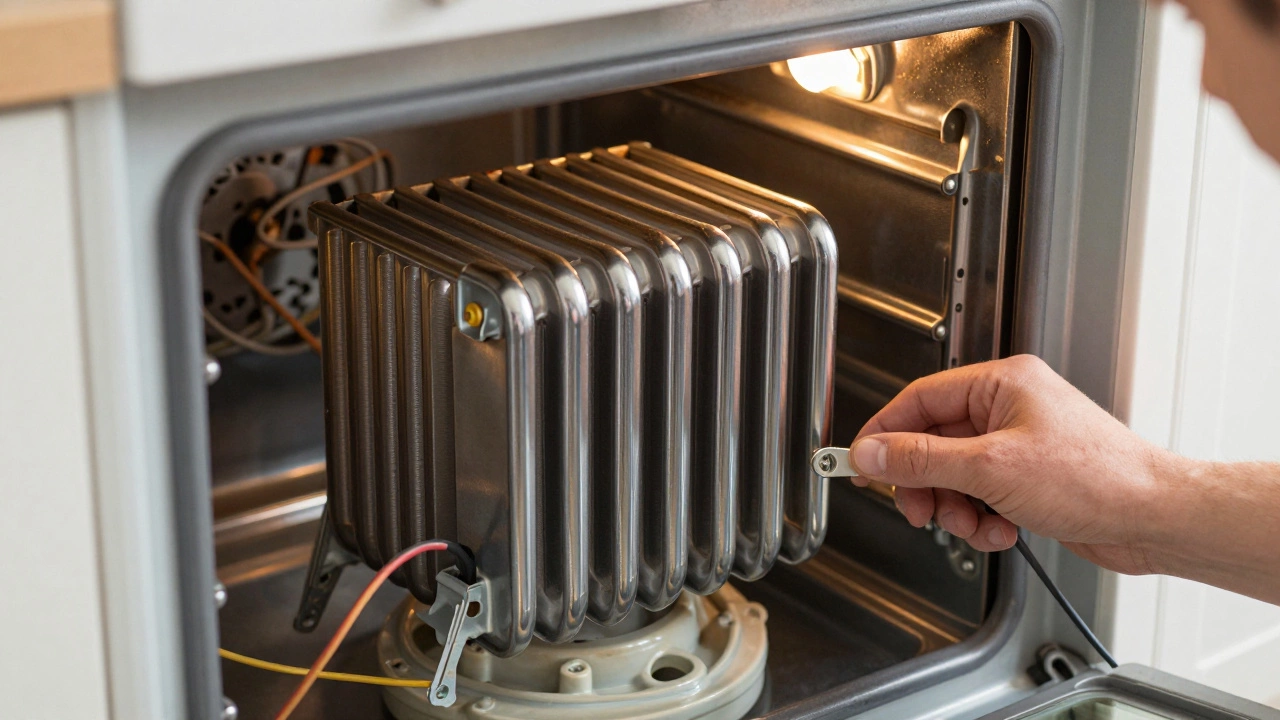
- Access the Element Terminals: For the bottom element, pull it forward slightly. You’ll see two wires connected to ceramic insulators on either side. Unscrew these connections carefully. Keep track of which wire goes where.
- Set the Multimeter: Turn the dial to the resistance (Ω) or continuity setting. If your meter has a continuity beep mode, use that-it makes results clearer.
- Touch Probes to Terminals: Place one probe on each terminal screw. Do not touch the probes together or let them bridge across the element body.
- Read the Result: A good element shows low resistance, typically between 10-40 ohms, depending on wattage. If the display reads "OL" (overload) or infinite resistance, the internal circuit is broken. The element must be replaced.
If you hear a continuous beep in continuity mode, the element is intact. Silence means it’s open-circuited and dead.
| Reading | Meaning | Action Required |
|---|---|---|
| 10-40 Ω | Element is functional | Check other components if oven still won’t heat |
| "OL" or Infinite | Internal break detected | Replace the heating element |
| 0 Ω or Near Zero | Short circuit (rare) | Replace element; check wiring for damage |
When the Element Isn’t the Culprit
If your element passes the continuity test but the oven still won’t heat, the problem lies elsewhere. Don’t replace the element yet-diagnose further.
Thermal Fuse: Many ovens include a safety fuse that blows if temperatures exceed safe limits. Locate it near the back wall or under the control panel. Test it with your multimeter. No continuity? Replace the fuse and investigate why it blew (e.g., blocked vents).
Relay Board or Control Module: The brain of your oven sends power to the element via relays. If a relay sticks open, no voltage reaches the element. Listen for clicking sounds when turning the oven on. Absence of clicks may indicate a failed relay. Professional diagnosis is recommended here due to high-voltage risks.
Temperature Sensor: A faulty sensor tells the control board the oven is already hot, so it cuts power prematurely. Test its resistance-it should change predictably as temperature rises. Compare readings to manufacturer specs.
Wiring Issues: Loose, corroded, or frayed wires can interrupt power flow. Inspect all connections from the terminal block to the element. Tighten or replace as needed.
Replacing a Faulty Heating Element
Once confirmed bad, replacing the element is straightforward. Follow these steps precisely to avoid injury or damage.
- Buy the Correct Replacement: Note the model number of your oven (usually on a sticker inside the door frame). Search online for exact matches. Verify wattage, voltage, and physical dimensions. Using mismatched parts can void warranties or create fire hazards.
- Remove the Old Element: Unplug the oven. Remove the two mounting screws holding the element in place. Disconnect the wires from the terminals. Pull the old element out gently.
- Install the New One: Position the new element in the same orientation. Connect the wires securely to their respective terminals. Screw the element back into place firmly but without over-tightening.
- Restore Power and Test: Plug the oven back in or reset the breaker. Run a quick bake cycle at 350°F. Confirm even heating and proper shutdown after reaching temperature.
Tip: Take photos before disconnecting wires. This helps ensure correct reconnection later.
Maintaining Your Oven Elements Longer
Prevention beats replacement. Simple habits extend the life of your heating elements significantly.
- Clean Regularly: Grease buildup insulates the element, causing overheating and premature failure. Wipe spills promptly and run self-clean cycles sparingly (high heat stresses components).
- Avoid Thermal Shock: Don’t spray cold water into a hot oven. Sudden temperature changes crack the coil.
- Use Proper Cookware: Avoid placing sharp-edged pans directly on the element. Scratches weaken the metal over time.
- Ensure Ventilation: Keep rear vents clear. Blocked airflow traps heat, accelerating wear.
By treating your oven gently, you reduce the frequency of repairs and maintain consistent cooking performance.
Can I use a universal oven element?
Universal elements exist but carry risks. They may differ in wattage, fit, or mounting style. Always prioritize OEM (Original Equipment Manufacturer) parts for compatibility and safety. If using a universal part, verify exact specifications match your oven’s requirements.
How long do oven heating elements last?
Typically 5-10 years with regular use. Lifespan depends on cleaning habits, frequency of use, and environmental factors like humidity. High-end models may last longer due to better materials.
Is it dangerous to test an oven element with power on?
Yes, extremely. Never attempt continuity tests or handle internal components while the oven is plugged in. Electric shocks from 240V circuits can be fatal. Always disconnect power first.
What if both elements fail simultaneously?
This rarely happens naturally. More likely, there’s a shared issue such as a blown thermal fuse, failed relay, or power supply problem. Diagnose upstream components before assuming both elements are dead.
Do convection ovens have different elements?
Convection ovens usually feature three elements: top, bottom, and a rear fan-assisted heater. Each serves distinct functions. When diagnosing, identify which mode isn’t working (bake, broil, or convection) to isolate the faulty component.