Oven Control Board Replacement Cost Calculator
Calculate your oven control board replacement cost based on part type and installation method.
Wondering how much you’ll actually pay to replace the control board on your oven? You’re not alone. Homeowners often get a surprise when a modern electric oven decides it won’t heat, and the tech tells them the control board is dead. Below you’ll find everything that drives the price, what you’ll typically pay in 2025 (New Zealand dollars), and a realistic DIY path if you’re comfortable getting under the hood.
What Is an Oven Control Board?
Oven control board is a printed circuit board that acts as the oven’s brain. It receives signals from the temperature knob or digital panel, decides when to fire the bake or grill elements, and monitors safety sensors. In a typical electric oven, the board also powers the clock, timer, and self‑clean cycle.
Without a functioning board, the oven may refuse to turn on, heat unevenly, or display error codes. Because the board controls power to the heating elements, a fault can be a fire risk, so replacement is not something to ignore.
What Drives the Cost?
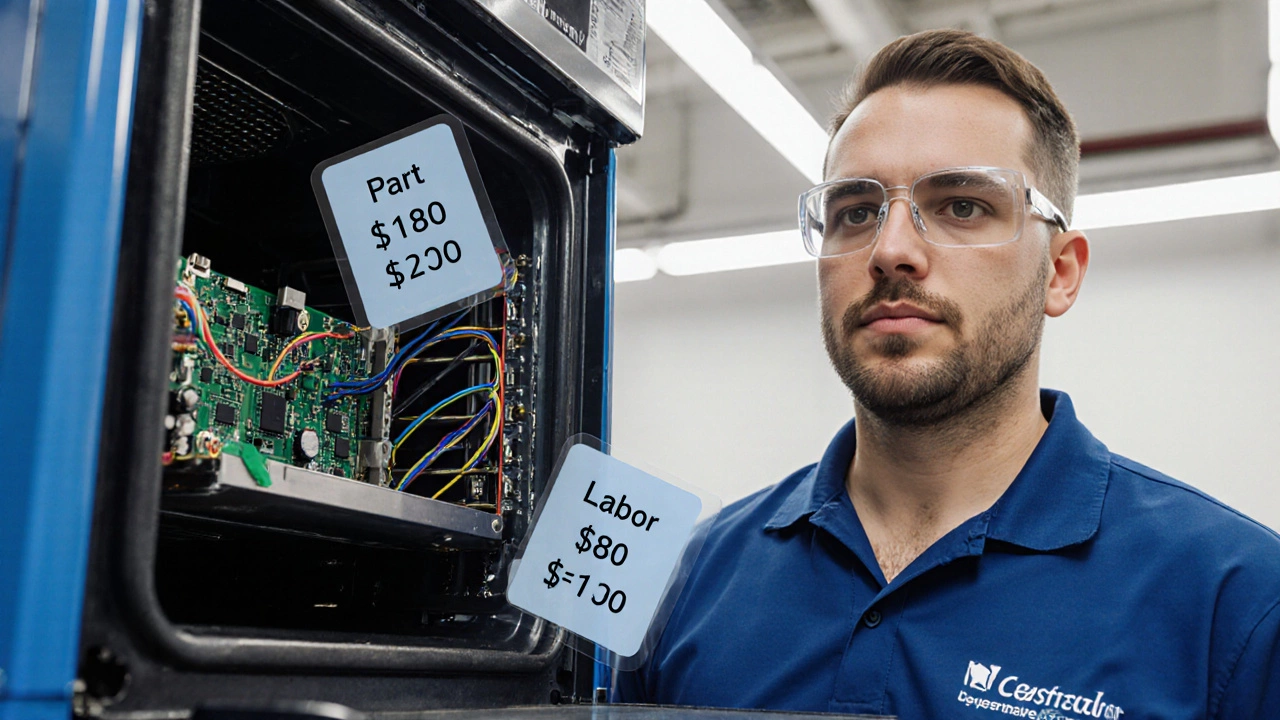
- Part price: OEM (original equipment manufacturer) boards are usually pricier than third‑party equivalents. A brand‑new OEM board for a mid‑range electric oven can sit between $150 and $300, while a reputable aftermarket part might be $90‑$180.
- Labor rates: Plumbers and electricians charge hourly. In Wellington, the average rate for a certified appliance technician is $80‑$110 per hour. Most jobs take 1‑2 hours, so labor adds $80‑$220.
- Diagnostic fees: Some services charge $30‑$60 just to confirm the board is the culprit. If you already know the fault, you can skip this cost.
- Warranty & service call: Companies that include a 12‑month guarantee on parts often bundle the warranty into the price. A one‑time service call fee of $25‑$40 is also common.
- Location & brand: Premium brands (e.g., Bosch, Miele) command higher part prices and may require brand‑specific calibration, pushing the total toward the upper end of the range.
Typical Price Ranges in 2025 (NZ$)
Below is a quick snapshot of what most homeowners pay, broken down by scenario:
| Scenario | Part Cost | Labor (1‑2 hrs) | Total Approx. |
|---|---|---|---|
| DIY with OEM board | $180‑$300 | $0 | $180‑$300 |
| DIY with aftermarket board | $90‑$180 | $0 | $90‑$180 |
| Professional service (OEM) | $180‑$300 | $80‑$220 | $260‑$520 |
| Professional service (aftermarket) | $90‑$180 | $80‑$220 | $170‑$400 |
These figures include a typical service call fee and a basic warranty where applicable. Prices can swing higher if the oven model requires a custom‑fit board or if hidden damage (burnt wiring, corroded connectors) is discovered.
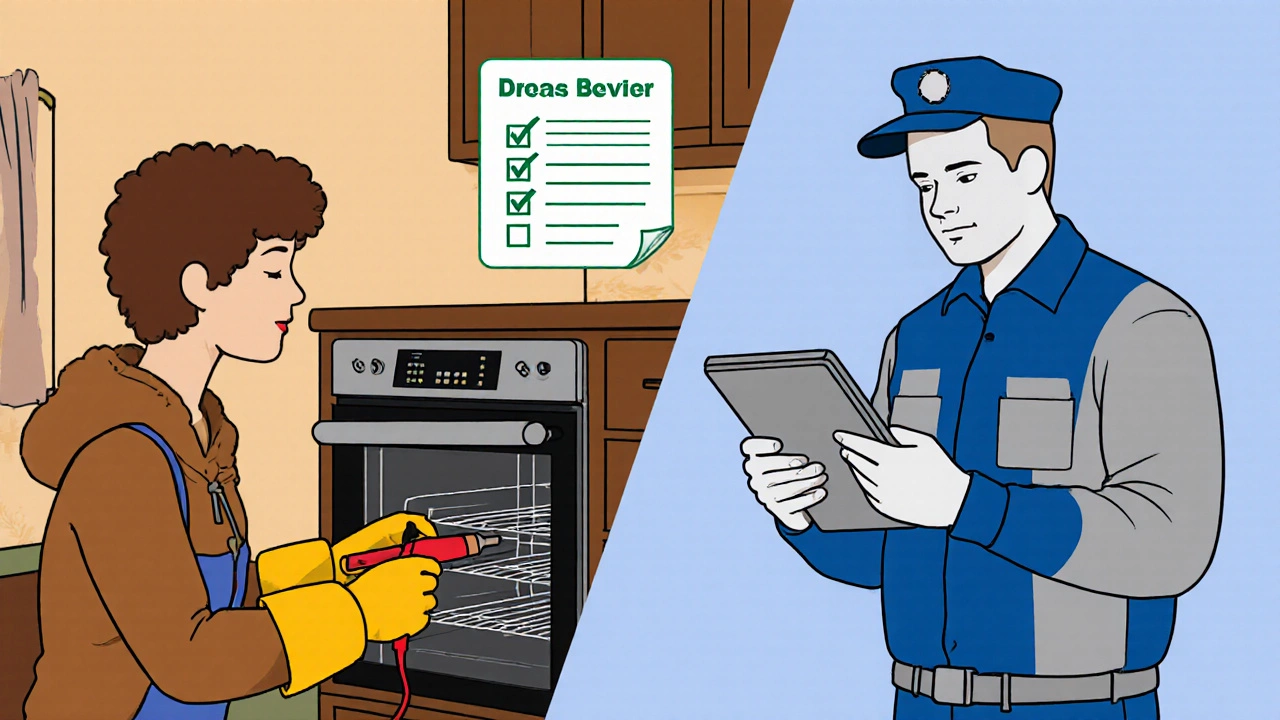
DIY vs. Professional Replacement
If you’re handy, swapping the board yourself can shave off $80‑$220 in labor. However, consider these points before you grab a screwdriver:
- Safety certification: Working on a 240 V circuit demands knowledge of electrical safety. In New Zealand, anyone performing the repair must be a licensed electrician or have a solid grounding in electrical codes.
- Warranty impact: Some manufacturers void the warranty if an unlicensed person opens the appliance. Check the warranty terms first.
- Tools needed: You’ll need a multimeter, insulated screwdrivers, and possibly a heat‑shrink kit for crimped connectors.
- Diagnostic certainty: If the control board isn’t actually the problem, you could spend money on a part you don’t need. A professional’s diagnostic fee often saves that risk.
When in doubt, a short call to a local service technician can confirm the fault and give you a precise estimate.
Step‑by‑Step DIY Guide (If You Choose to Go Solo)
- Gather tools and safety gear. You’ll need insulated screwdrivers, a digital multimeter, a needle‑nose pliers, and insulated gloves.
- Disconnect power. Turn off the dedicated oven circuit at the main breaker. Verify there’s no voltage with the multimeter.
- Access the control board. Most electric ovens have a rear access panel secured with four to six screws. Remove the panel and locate the board - it’s a flat, usually black PCB with a metal shield.
- Document wiring. Snap a photo of the connector layout before unplugging anything. This saves you from guessing later.
- Release connectors. Press the release tabs on each wire harness and gently pull the plugs away. If pins are stubborn, use a plastic pry tool.
- Remove the board. Unscrew the mounting brackets (usually two or three). Keep the screws in a small container.
- Install the new board. Place the replacement board, re‑attach the brackets, and reconnect the harnesses exactly as they were. Double‑check that each clip clicks into place.
- Re‑assemble and test. Re‑install the rear panel, restore power at the breaker, and run a short bake cycle. The oven should heat normally and any error codes should disappear.
- Dispose of the old board responsibly. Many local councils accept electronic waste; drop it off at a recycling centre.
Even though the process looks straightforward, the hardest part is ensuring you reconnect every wire correctly. A single mis‑wired connection can cause the oven to stay off or, worse, trip the circuit breaker.
When to Call a Pro (Even If You’re Confident)
Call in a licensed appliance repair technician if you encounter any of these red flags:
- The oven displays intermittent error codes that change after each cycle.
- You spot burnt or melted wiring around the control board.
- The oven is under a manufacturer’s warranty that explicitly requires a certified repair.
- You lack a spare 240 V breaker or feel unsure about handling high‑voltage components.
Professional services typically include a post‑repair test, a written warranty on the part, and a safety certification document - valuable if you’re renting or need proof for insurance.
Saving Money and Avoiding Scams
Here are a few tried‑and‑true tips to keep the bill reasonable:
- Shop around for the part before you commit. Online retailers (e.g., TradeMe, Appliance Parts Plus) often list OEM and aftermarket options side‑by‑side.
- Ask for a detailed quote that breaks out part, labor, and any additional fees. Transparent pricing is a good sign of a reputable business.
- Beware of “flat‑rate” services that charge $500+ without explaining the breakdown. Compare the quote against the table above.
- Check reviews on Trustpilot or local community boards. A business with consistent five‑star feedback on honest pricing is worth the trust.
- If you opt for DIY, keep the receipt for the board. Some manufacturers will honour a warranty on the part even if you install it yourself.
By staying informed about typical costs and the factors that influence them, you can decide whether the oven control board replacement cost feels fair for your situation.
Frequently Asked Questions
How long does a professional replacement usually take?
Most certified technicians finish the swap in 60‑90 minutes, assuming no hidden damage. Including travel time, you should expect a two‑hour window.
Can I use a generic control board on a high‑end oven?
It’s possible, but high‑end brands often calibrate their boards to specific heating curves. Using a generic board may result in inaccurate temperature control or void the warranty.
Do I need a special tool to detach the connectors?
Most connectors have built‑in release tabs that can be pressed with a flat‑head screwdriver or a plastic pry tool. No specialty tool is required.
Is it worth repairing an old oven versus buying a new one?
If the oven is less than 10‑12 years old and the replacement cost stays under $300, repair usually makes sense. New mid‑range electric ovens start around $1,200, so a $400 fix can be a better deal.
What safety checks should I perform after replacement?
Run a short 10‑minute bake at a low temperature, watch for any tripping of the breaker, and listen for unusual noises. Also verify that all display functions (clock, timer) work correctly.