Quick Cost Breakdown
- DIY Part Cost: $40 to $150
- Professional Labor: $80 to $200
- Total Professional Cost: $120 to $350
- Average Repair Time: 30 to 60 minutes
What exactly is an oven element?
Before we talk money, let's get the basics straight. In an electric oven, a Heating Element is a metal coil or rod that converts electrical energy into heat through resistance. Depending on your model, you likely have two: a bake element at the bottom and a broil element at the top. Some high-end convection ovens also have a third element around a fan.
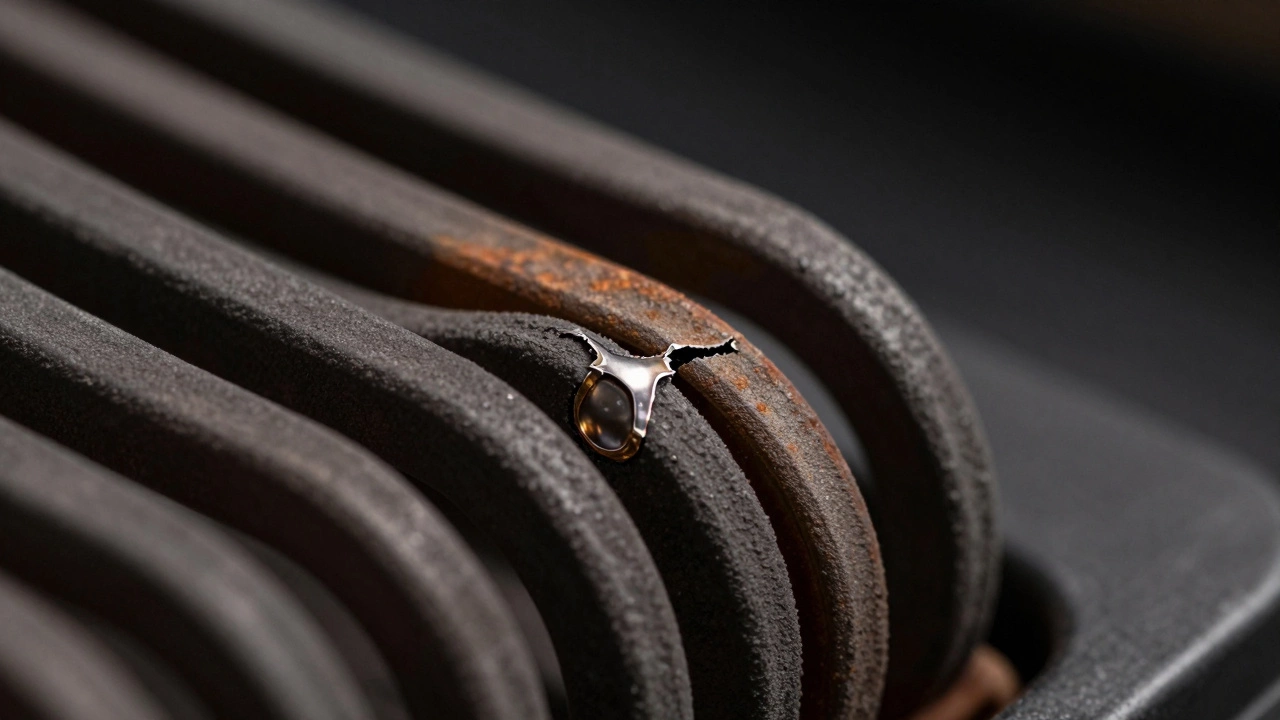
These parts are designed to withstand intense heat, but they eventually succumb to "thermal fatigue." This means the metal expands and contracts until it develops a microscopic crack. Once that happens, the electrical circuit is broken, and your oven becomes a very expensive storage cupboard. You'll often see a physical break, a blister, or a burnt spot on the coil if you look closely.
Breaking down the costs of replacement
The total price for an electric oven element cost depends on three main things: the brand of the appliance, the type of element, and who is doing the work. If you have a standard GE or Whirlpool model, parts are generally affordable and widely available. If you're rocking a professional-grade Wolf or Viking oven, expect the part cost to double or triple.
Here is how the pricing usually shakes out:
| Element Type | Part Only (DIY) | Pro Install (Total) | Difficulty Level |
|---|---|---|---|
| Standard Bake Element | $40 - $90 | $150 - $250 | Easy |
| Broil Element | $50 - $110 | $160 - $280 | Easy/Medium |
| Convection/Fan Element | $80 - $160 | $200 - $350 | Medium |
| Premium Brand Parts | $150 - $300 | $300 - $500 | Variable |
DIY vs. Professional: Which way should you go?
If you're comfortable turning off a circuit breaker and using a nut driver, this is a prime candidate for a DIY fix. Most elements are held in by a few screws and a couple of wire connectors. It's a "plug and play" situation for the most part.
However, there are times when the element isn't the actual problem. You might have a failed Thermostat or a blown Thermal Fuse. A professional technician will use a Multimeter to test for continuity. If you just buy a new element and it still doesn't work, you've wasted $60 and a whole afternoon.
Think of it this way: paying a pro for a diagnostic visit (usually $80-$120) ensures you're fixing the right thing. If you're confident the element is physically broken, go the DIY route. If the oven just "stopped working" without any visible signs of damage, a pro is the safer bet.
How to identify a failing element before it dies
You don't always have to wait for the oven to completely fail. There are a few warning signs that a replacement is coming soon. Keep an eye out for these red flags:
- Uneven baking: If your cookies are burnt on one side and raw on the other, a section of the bake element might be dead.
- Strange smells: A pungent, metallic, or "electrical" burning smell during preheating can indicate a short circuit in the coil.
- Slower preheating: If it usually takes 10 minutes to hit 350°F but now takes 25, the element is losing efficiency.
- Visible damage: Look for any spots where the metal looks blistered, warped, or has a clear gap in the coil.
Step-by-step: How to replace the element yourself
If you've decided to tackle this yourself, follow these steps. Safety is the most important part-electricity and ovens are a dangerous mix if you're careless.
- Cut the power: Do not just turn off the oven. Go to your home's electrical panel and flip the breaker for the oven. If you don't, you risk a severe electric shock.
- Clear the area: Remove the oven racks and any baking sheets. If it's the bake element, you'll be working at the bottom; for the broil element, you'll be at the top.
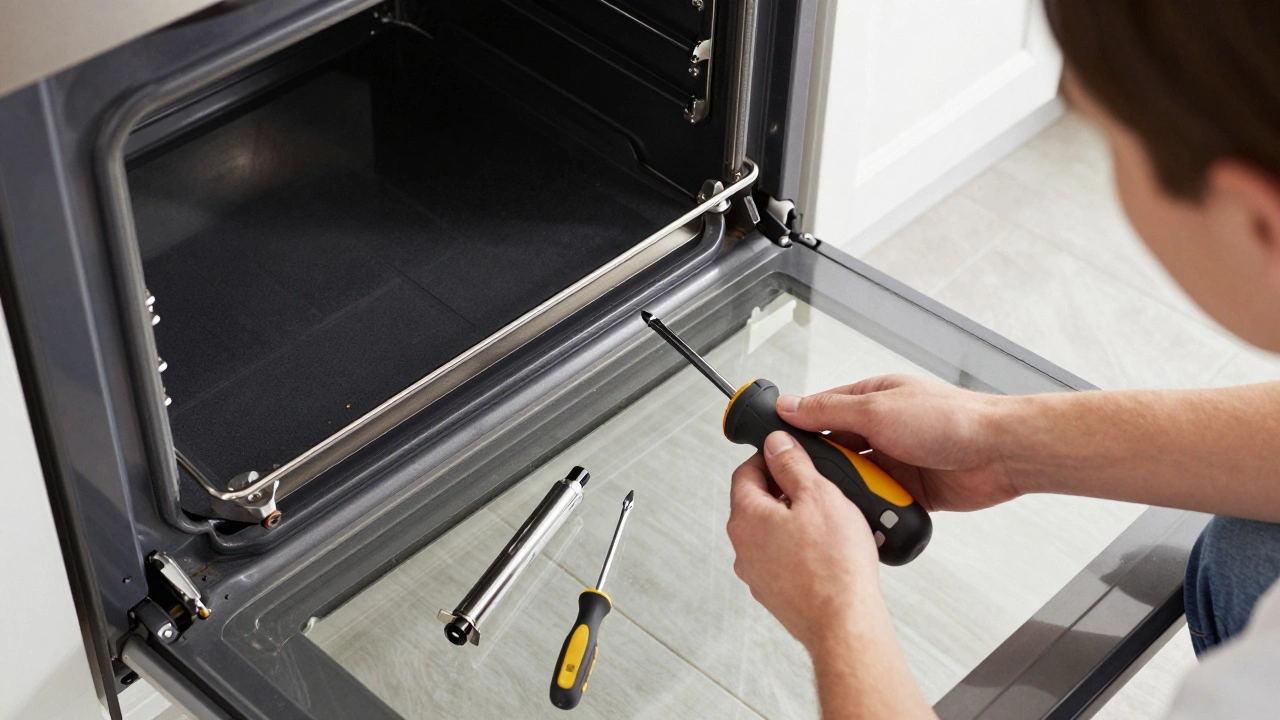
- Unscrew the element: Most elements are held in by two or three screws. Use a screwdriver or a nut driver to remove them.
- Pull it back and disconnect: Gently pull the element away from the oven wall to reveal the wiring. Use pliers to pull the wire connectors off the element terminals.
- Compare the parts: Hold your old element up next to the new one. Check the length and the terminal positions. Installing the wrong model can cause the element to touch the oven wall, leading to a short.
- Install and secure: Slide the new element in, attach the wire connectors firmly, and tighten the screws. Don't over-tighten, or you might crack the porcelain casing.
- Test run: Turn the power back on and run the oven at 300°F for a few minutes. If it heats up evenly, you're done.
Avoiding common pitfalls and mistakes
One of the biggest mistakes homeowners make is buying a "universal" element that doesn't actually fit. While they are cheaper, universal parts often require modification or don't distribute heat as evenly as OEM (Original Equipment Manufacturer) parts. If you can afford the extra $20, always go with the brand-name part designed for your specific model number.
Another trap is ignoring the Control Board. If your element burnt out because of a power surge or a faulty relay on the control board, a new element might burn out again within a week. If you notice the element is flickering or only heating intermittently, the issue is likely deeper than just a broken coil.
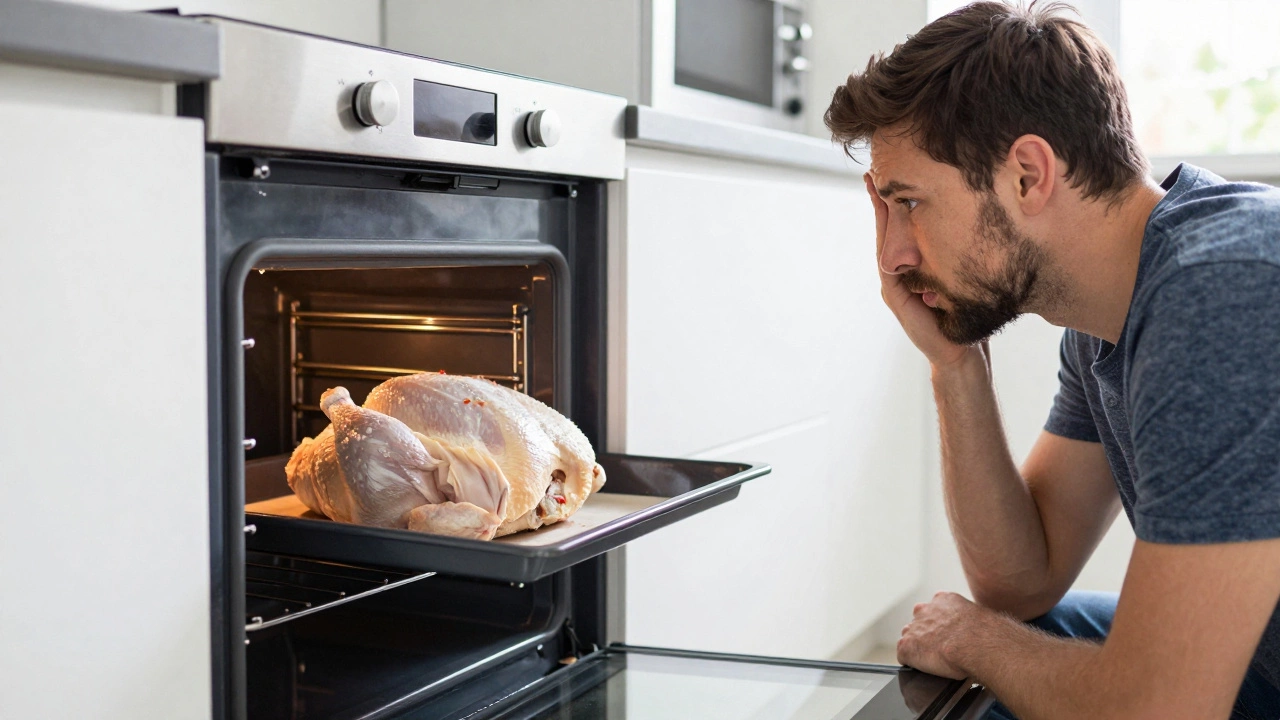
Why did my oven element burn out so quickly?
Most elements fail due to age and heat cycles. However, if it happened suddenly, it could be due to a power surge, using the oven at maximum temperature for extended periods, or a buildup of grease and food debris that caused a "hot spot" on the coil, leading to a premature break.
Can I use the oven if only one element is broken?
Technically, yes. If your broil element is dead but the bake element works, you can still bake cookies or roast a chicken. However, you cannot broil or sear. It is generally safe, but you should replace the broken part soon to avoid putting extra strain on the remaining working element.
Is it worth replacing the element or buying a new oven?
If the repair costs $150 and the oven is only 5 years old, definitely repair it. If the oven is 15+ years old and has other issues (like a failing door seal or broken knobs), you might consider upgrading. Replacing an element is a very low-cost fix compared to the $600-$1,200 cost of a new electric range.
How do I find the correct part number for my oven?
Locate the model number tag. This is usually found on the frame inside the oven door, on the side of the storage drawer at the bottom, or behind the control panel. Once you have the model number, enter it into the manufacturer's parts website or a trusted appliance parts retailer to find the exact matching element.
Do I need a special tool to test an oven element?
Yes, you need a multimeter. By setting it to the ohms (Ω) setting and touching the probes to the element's terminals, you can check for continuity. If the multimeter shows "OL" (Open Line) or no reading, the internal coil is broken and the element must be replaced.
What to do next
If you've just replaced your element and the oven still isn't heating, don't panic. Check your circuit breaker again-sometimes the process of a part failing can trip the breaker. If the power is on and the new element isn't working, it's time to stop DIYing and call a certified technician. You likely have a faulty Temperature Sensor or a problem with the main control board that requires a professional diagnostic tool to solve.