Bathroom Extractor Fan Sizing Calculator
Calculate Your Ideal Extractor Fan Size
Find the right fan size based on your bathroom dimensions and airflow needs. Follow New Zealand building standards for effective moisture control.
Recommended Extractor Fan
Size
Standard for most bathrooms
Airflow
Minimum requirement
Additional Features
Essential for New Zealand bathrooms
Why this size?
Your bathroom is 4.5m². For bathrooms under 10m², a 150mm fan with 50 CFM airflow meets New Zealand building standards. If you have a shower, consider a 200mm model.
Replacing an extractor fan doesn’t have to be a nightmare. If your bathroom smells musty, your mirror stays foggy, or the fan makes a noise like a dying vacuum, you don’t need to call a pro. Most homeowners in New Zealand can swap out an old extractor fan in under two hours-with no special tools, no electrician, and no mess. The real question isn’t whether it’s hard. It’s whether you’ve been scared off by stories that make it sound like brain surgery.
Why Replace an Extractor Fan at All?
- It doesn’t move air anymore-your bathroom stays damp after showers.
- The motor whines or buzzes like a broken fridge.
- It’s covered in grease and dust from years of use.
- The grille is cracked or discolored.
- You’re upgrading to a quieter, more efficient model.
In Wellington’s humid climate, a failing extractor fan doesn’t just annoy you-it invites mold. A 2023 study by the New Zealand Building Research Association found that 68% of homes with persistent bathroom mold had extractor fans that were either broken or undersized. Replacing it isn’t a luxury. It’s basic home maintenance.
What Tools Do You Actually Need?
You don’t need a toolbox full of gadgets. Here’s what you’ll actually use:
- Phillips screwdriver (or a cordless drill with a bit)
- Utility knife or Stanley knife
- Wire strippers (optional, but helpful)
- Stiff brush or vacuum cleaner
- Masking tape
- Replacement extractor fan (make sure it matches your old one’s size)
That’s it. No voltage testers, no circuit breakers to flip, no drywall saws. If you’ve ever changed a lightbulb, you’ve got the skills.
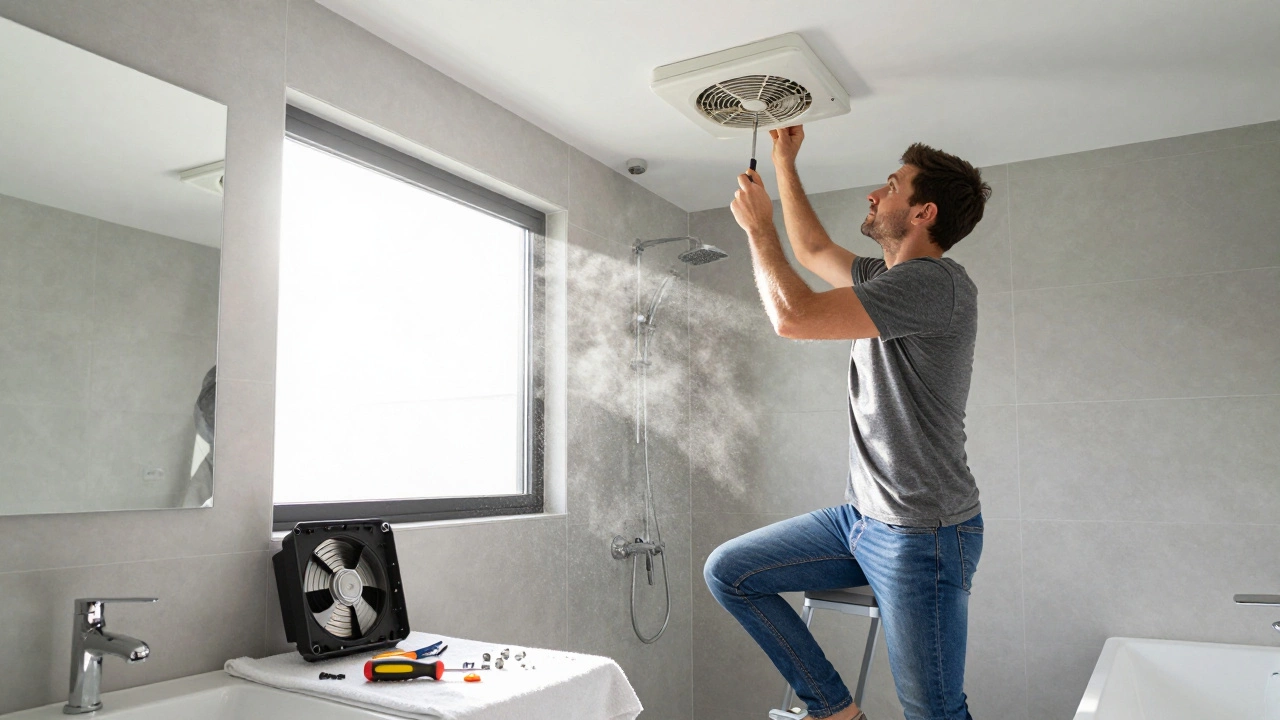
Step 1: Turn Off the Power
This isn’t optional. Even if the fan’s dead, the wires behind it might still be live. Go to your switchboard and turn off the circuit that controls the bathroom. If you’re not sure which one, turn off the main switch. It’s safer. Use a non-contact voltage tester (they cost under $20 at Bunnings) to double-check the wires. If it beeps, you didn’t turn off the right circuit. Try again.
Step 2: Remove the Old Fan
Most extractor fans are held in place by two or four screws around the grille. Unscrew those. The grille should pop off easily. Behind it, you’ll see the motor unit, usually clipped into the ceiling cavity or screwed into a mounting frame.
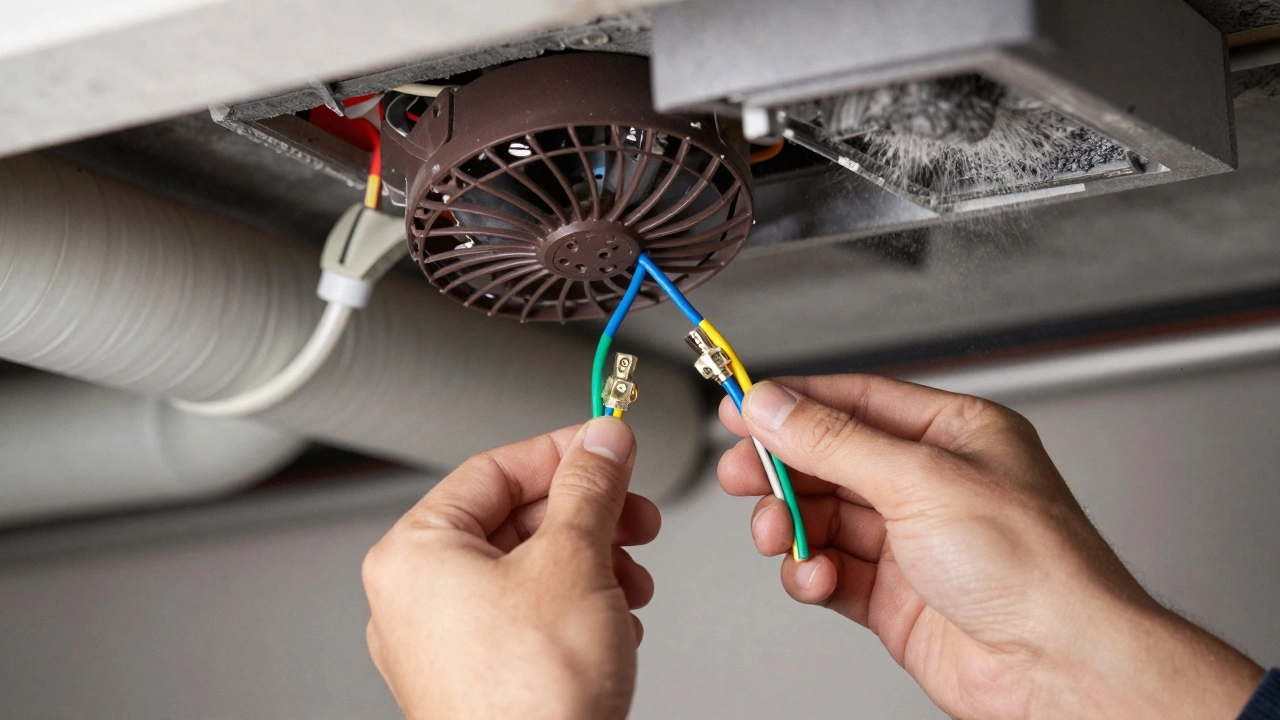
Some older models have a metal housing bolted to the joists. If yours does, you’ll see two or three screws holding it in place. Unscrew those. Gently pull the unit down. You’ll see wires connected with wire nuts-usually two or three: live (brown), neutral (blue), and earth (green/yellow).
Take a photo with your phone before you disconnect anything. That way, if you forget which wire went where, you’ve got a reference. Don’t just guess.
Step 3: Disconnect the Wires
Twist the wire nuts counterclockwise to unscrew them. Pull the wires apart. If they’re brittle or frayed, use wire strippers to cut back the damaged part and strip about 1 cm of insulation. New fans come with pre-stripped wires, so you won’t need to do this unless the old ones are damaged.
Some newer fans use quick-connect terminals. If yours does, just press the release tab and pull the wire out. No twisting needed.
Step 4: Clean the Opening
This step gets skipped a lot-and that’s why new fans fail early. Dust, spider webs, and old insulation get packed into the ceiling cavity. Use a stiff brush or vacuum to clean the hole. If the ducting is clogged with grease, pull it out and clean it with warm soapy water. Let it dry before reconnecting.
Check the duct’s path. If it’s squashed, kinked, or blocked by insulation, fix it now. A fan can’t work if the air has nowhere to go.
Step 5: Install the New Fan
Most modern extractor fans are designed to fit into existing holes. The new unit should slide right in. If it’s a tight fit, don’t force it. Check the dimensions. A standard bathroom fan is 150mm to 200mm in diameter. If your old one was 125mm, you might need a different model.
Connect the wires: brown to brown, blue to blue, green/yellow to green/yellow. Twist the wires together, then screw on the wire nuts. Pull gently to make sure they’re secure. Wrap electrical tape around the base of the wire nuts for extra safety.
If your new fan has a timer or humidity sensor, follow the manufacturer’s instructions. Some need a separate wire for the sensor. If you’re unsure, stick with a basic model.
Step 6: Secure and Test
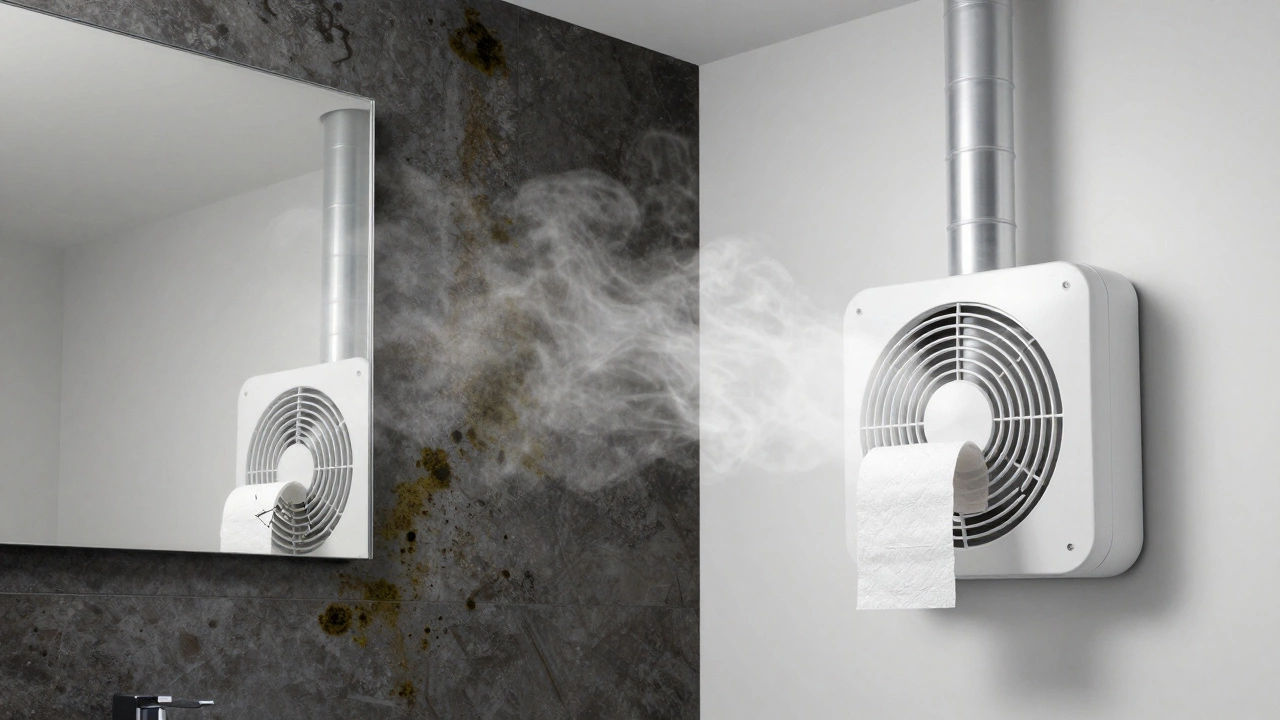
Clip or screw the new fan into place. Reattach the grille. Turn the power back on. Flip the switch. You should hear a smooth hum-not a grind, not a buzz. If it’s noisy, check that the fan isn’t touching the duct or the housing. Tighten any loose screws.
Hold a piece of toilet paper near the grille. It should stick to the fan. If it doesn’t, the airflow is weak. Double-check the ducting. If it’s clear and the fan still doesn’t move air, you might have a defective unit. Return it.
What If You Get Stuck?
Here are the three most common problems-and how to fix them:
- The wires are too short. Don’t stretch them. Buy a fan with longer leads or extend the wires with proper junction boxes. Never splice wires inside the ceiling cavity without a box.
- The new fan doesn’t fit the hole. Measure your old fan’s cut-out size before buying. Most replacements are interchangeable, but some are deeper. If it’s too deep, you might need to cut away ceiling insulation or use a shallow-mount model.
- The fan runs but smells like burning. Turn it off immediately. This usually means the motor is wired wrong or the capacitor is faulty. Check your connections. If it still smells, return the fan.
How Much Does It Cost?
A basic extractor fan costs between $50 and $120. Higher-end models with humidity sensors, LED lights, or Bluetooth controls run $150-$250. Labor? If you do it yourself, it’s $0. If you hire someone, expect $150-$250 in Wellington, depending on access and complexity.
Most people spend $80 on a fan and 90 minutes of their time. That’s cheaper than a haircut.
What to Buy
Look for these features:
- 150mm or 200mm diameter-matches most standard ceiling cut-outs.
- Low decibel rating-under 25dB is whisper-quiet. Anything above 35dB will be annoying.
- IP44 rating-required for bathrooms in New Zealand. Means it’s splash-proof.
- Timer or humidity sensor-lets the fan run for 10-15 minutes after you leave the room. Reduces mold risk.
Brands like Vent-Axia, Manrose, and Ausclimate are reliable and widely available in New Zealand. Avoid no-name brands from online marketplaces-they often fail within a year.
When to Call a Pro
You don’t need an electrician for a standard replacement. But call one if:
- The wiring is old, frayed, or aluminum (not copper).
- The fan is wired into a switched outlet, not a dedicated circuit.
- You’re installing a fan in a shower recess and need a GFCI circuit.
- You’re unsure about your home’s electrical setup.
Most homes built after 1990 have safe, modern wiring. If yours is older, a quick check from an electrician is worth $100. It’s better than risking a fire.
Final Tip: Don’t Wait
Mold doesn’t care if you’re busy. A damp bathroom can grow black mold in as little as 48 hours. Replacing a fan now saves you thousands later-on mold remediation, repainting, or replacing warped cabinetry.
It’s not hard. It’s not scary. It’s just a few screws, a few wires, and a few minutes of your time. And after you’re done? You’ll never again have to wipe condensation off the mirror.
Can I replace my extractor fan without turning off the power?
No. Even if the fan isn’t working, the wires behind it could still be live. Turning off the power is the only safe way to prevent electric shock. Always use a non-contact voltage tester to confirm the circuit is dead before touching any wires.
Do I need to replace the ducting too?
Not always. If the duct is clean, straight, and securely attached, you can reuse it. But if it’s kinked, crushed, covered in grease, or made of flexible plastic that’s cracked, replace it. A blocked duct makes even the best fan useless. Metal ducting lasts longer and is easier to clean.
What size extractor fan do I need for my bathroom?
For most bathrooms under 10m², a 150mm fan is enough. For larger bathrooms or those with a shower, go for a 200mm model. Rule of thumb: the fan should move at least 15 liters of air per second. Check the CFM (cubic feet per minute) rating on the box-aim for at least 50 CFM.
Can I install a fan with a light in it?
Yes, but only if your existing wiring supports it. Most combo units need a separate live wire for the light. If your old fan only had two wires (live and neutral), you’ll need to run a new cable or stick with a fan-only model. Check the manual before buying.
Why does my new fan make a rattling noise?
It’s usually because the fan housing isn’t seated properly, or the duct is loose. Turn off the power and check that all screws are tight. Make sure the duct isn’t touching the fan blades or vibrating against a joist. Sometimes, a small piece of insulation or debris gets caught in the housing. Remove the grille and inspect the fan.