
Heat Pump Failure Diagnostic Tool
Select the primary symptom you are experiencing to identify the likely cause and recommended action.
Enter your heat pump's symptoms above to receive a diagnosis and maintenance advice.
Your heat pump is the unsung hero of your home’s comfort system. It keeps you warm in winter and cool in summer, all while using significantly less energy than traditional heating or cooling systems. But when it stops working, the silence is deafening-and expensive. You might be wondering why a reliable unit suddenly decides to quit. Is it age? Neglect? Or something more sinister?
Heat pumps don’t usually fail overnight without warning signs. Most breakdowns are the result of gradual wear and tear, environmental factors, or simple neglect. Understanding what causes a heat pump to go bad can save you thousands in emergency repairs and extend the life of your equipment by years.
Key Takeaways
- Dirt-clogged air filters are the #1 cause of premature heat pump failure, restricting airflow and causing overheating.
- Refrigerant leaks reduce efficiency by up to 30% and can permanently damage the compressor if ignored.
- The outdoor condenser coil is vulnerable to debris, rust, and physical damage, which severely impacts performance.
- Thermostat misconfigurations or dead batteries often mimic mechanical failures, leading to unnecessary service calls.
- Annual professional maintenance prevents 80% of major heat pump breakdowns according to industry data.
Dirty Air Filters: The Silent Killer
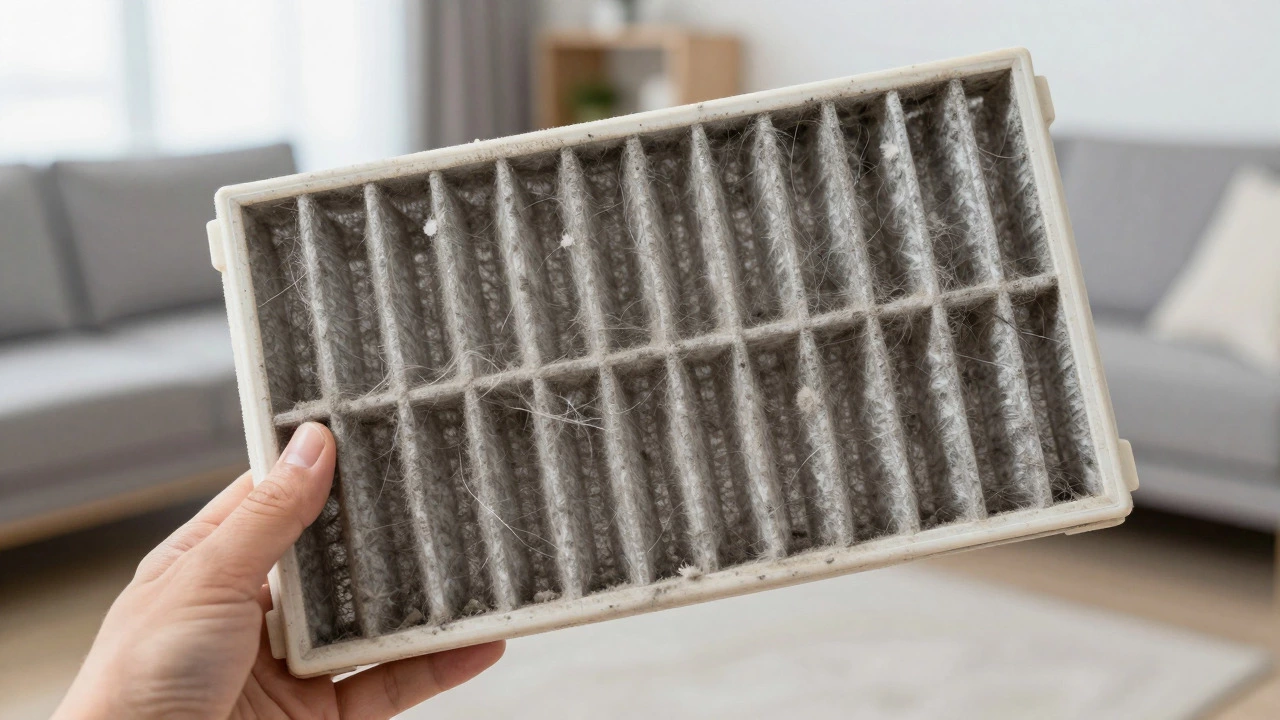
If there’s one thing that kills heat pumps faster than anything else, it’s dirty air filters. Think of your air filter like the lungs of your HVAC system. When they’re clogged with dust, pet hair, and pollen, the system has to work twice as hard to push air through. This extra strain increases energy consumption and causes components to overheat.
Here’s how it plays out in real life: Your indoor blower motor struggles against restricted airflow. The evaporator coil gets colder than designed because air isn’t moving across it properly. Eventually, moisture on the coil freezes into ice. You might notice reduced airflow from vents, higher electricity bills, or even water leaking from the unit. If you keep running the system with frozen coils, you risk damaging the compressor-the most expensive part to replace.
Pro tip: Check your filters monthly during peak seasons (winter and summer). Replace standard fiberglass filters every 30 days. For pleated media filters, every 60-90 days is usually sufficient unless you have pets or live in a dusty area. Mark your calendar or set a phone reminder-this single habit prevents more failures than any other maintenance task.
Refrigerant Leaks: Efficiency Drain and Compressor Hazard
Refrigerant is the lifeblood of your heat pump. It absorbs heat indoors during cooling mode and releases it outdoors during heating mode. When refrigerant levels drop due to leaks, your system loses its ability to transfer heat effectively. You’ll notice longer run times, weaker airflow, and rising utility bills.
But here’s the danger most homeowners miss: low refrigerant doesn’t just make your system inefficient-it destroys the compressor. The compressor relies on refrigerant for lubrication and cooling. Without adequate levels, metal parts grind together, creating debris that circulates through the entire system. Once those metallic particles enter the expansion valve or capillary tube, you’re looking at a complete system flush and likely a new compressor.
Common leak points include:
- Copper line sets connecting indoor and outdoor units
- Solder joints that weaken over time due to vibration
- Corroded service ports where technicians connect gauges
- Cracked evaporator or condenser coils from physical impact
If you suspect a refrigerant leak, turn off the system immediately. Running a heat pump with low refrigerant accelerates compressor failure. A qualified technician will use electronic leak detectors or ultraviolet dye to locate the source, then repair and recharge the system to manufacturer specifications.
Condenser Coil Damage: Outdoor Exposure Takes Its Toll
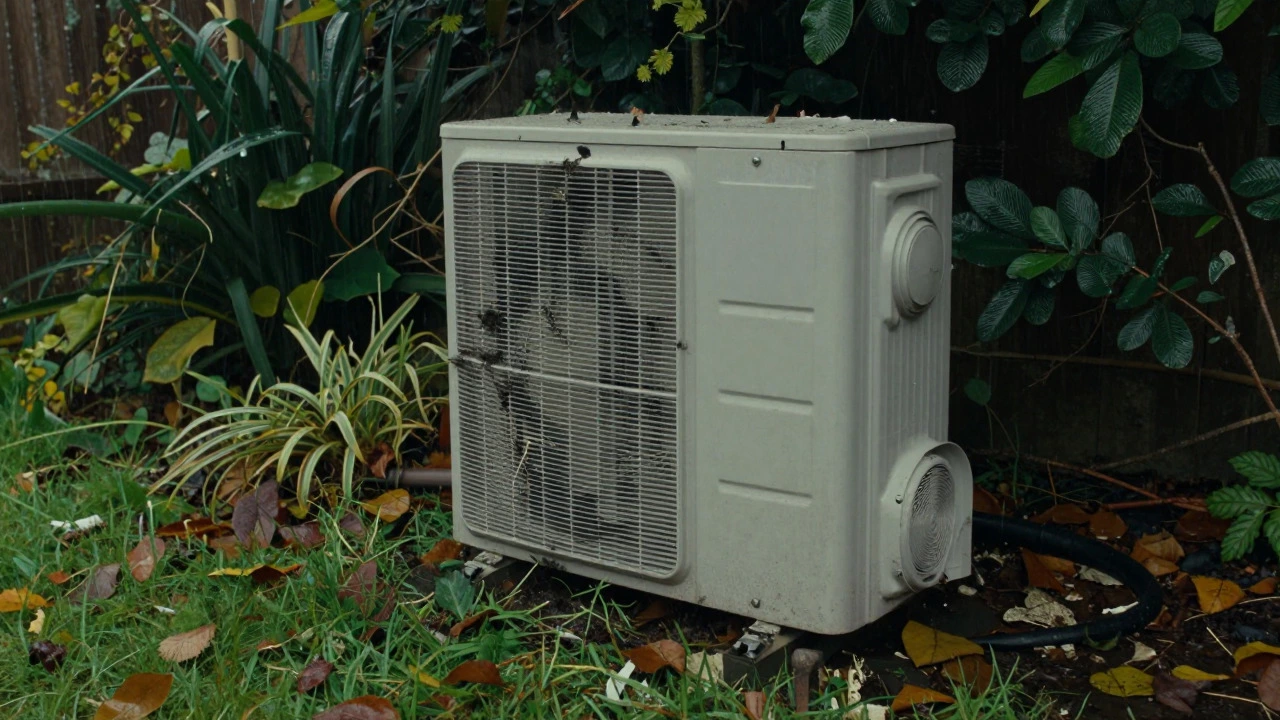
Your outdoor unit faces the full brunt of weather, debris, and accidental damage. The condenser coil sits exposed to rain, wind, leaves, grass clippings, and even wayward garden hoses. Over time, these elements accumulate on the coil fins, creating an insulating layer that prevents proper heat exchange.
In Wellington, New Zealand, coastal salt air adds another challenge. Salt crystals settle on metal surfaces and accelerate corrosion. Within three to five years, unprotected aluminum fins develop pinhole leaks and structural weakness. Bend the fins slightly to clear debris, and you create turbulence that reduces airflow efficiency by 15-20%.
Physical damage is equally common. Lawnmowers strike condenser units every season. Kids playing basketball knock them over. Even heavy snowfall can crush delicate fins if the unit isn’t protected. Once the coil structure is compromised, refrigerant leaks become inevitable.
Prevention strategy: Keep a two-foot clearance zone around your outdoor unit. Install a protective screen made of quarter-inch hardware cloth to stop large debris while allowing airflow. Gently wash coils with a garden hose once per year-never use a pressure washer, which bends fins instantly.
Thermostat Issues: Miscommunication Between Brain and Body
Before assuming your heat pump is broken, check the thermostat. Surprisingly, thermostat problems account for nearly 30% of service calls. Dead batteries, incorrect settings, or wiring faults can make a perfectly healthy system appear malfunctioning.
Modern programmable thermostats introduce new failure modes. Incorrect scheduling causes short cycling-turning the system on and off too frequently. Each startup cycle puts stress on the compressor and contactor. After hundreds of premature cycles, components wear out prematurely. I’ve seen units fail within two years simply because owners programmed aggressive temperature swings without understanding staging requirements.
Wiring issues are particularly tricky. Loose connections at the thermostat base cause intermittent signals. The system thinks the house reached setpoint, shuts down, then restarts minutes later when voltage drops again. This “ghost cycling” wastes energy and confuses diagnostics.
Quick diagnostic: Remove the thermostat faceplate and inspect battery contacts for corrosion. Clean terminals with electrical contact cleaner. Verify wire connections are tight under screw terminals. If you have a smart thermostat, check firmware updates and recalibrate sensors according to manufacturer instructions.
Compressor Failure: The Costly End Stage
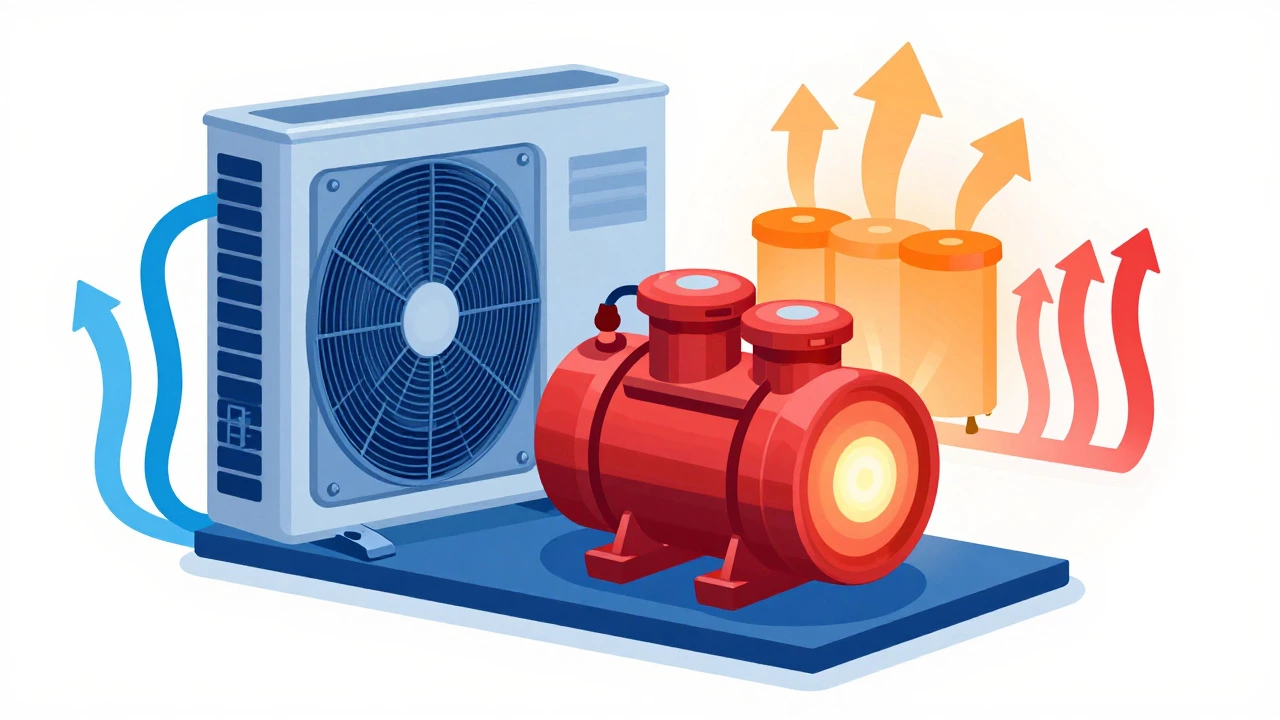
The compressor is the heart of your heat pump. It pressurizes refrigerant gas and drives it through the system. When compressors fail, they rarely whisper-they scream. Loud humming, clicking, or complete silence indicates serious trouble.
Compressor failure typically stems from three root causes:
- Electrical overload: Voltage spikes from storms or grid instability fry internal windings. Surge protectors rated for HVAC equipment prevent this.
- Lubrication breakdown: Old oil degrades into sludge, starving bearings of protection. Regular oil changes during maintenance restore viscosity.
- Mechanical seizure: Debris from earlier component failures enters the crankcase, locking pistons or scrolls in place.
Replacing a compressor costs between $2,500 and $5,000 including labor. In many cases, especially with units older than ten years, replacing the entire heat pump proves more economical. Modern inverters offer variable-speed operation that matches demand precisely, reducing startup stress by 40% compared to single-stage models.
Electrical Component Degradation: Contactors and Capacitors
Inside your outdoor unit, small electrical components handle massive current loads daily. Contactors switch power to the compressor and fan motors. Capacitors provide the initial jolt needed to start these motors. Both degrade silently until they fail catastrophically.
Contactors show visible signs of wear: pitted contact surfaces, melted insulation, or arcing marks. These indicate resistance buildup, generating heat that weakens surrounding wires. A failing contactor may stick closed, keeping the compressor running after the thermostat calls for shutdown. Or it may open intermittently, causing nuisance tripping of circuit breakers.
Capacitors bulge, leak electrolyte fluid, or lose microfarad rating over time. Weak capacitors struggle to start motors, resulting in loud humming without rotation. Motors draw excessive current trying to overcome inertia, triggering overload protection. If you hear humming but see no fan movement, suspect the capacitor first.
Maintenance insight: Technicians test capacitance with multimeters during annual inspections. Replacing worn capacitors costs $100-$200 but prevents motor burnout worth $800+. Don’t skip this check-it’s cheap insurance against expensive failures.
Drain Line Blockages: Water Damage and Mold Growth
During cooling mode, your heat pump removes humidity from indoor air. That moisture collects on the evaporator coil and drains outside through a PVC pipe. When this line clogs with algae, mold, or sediment, water backs up into the drain pan and overflows onto floors, walls, and ceilings.
New Zealand’s humid climate accelerates biological growth in drain lines. Algae forms slimy biofilms that trap debris. Within months, partial blockages become complete obstructions. You won’t notice until water stains appear on drywall or musty odors fill rooms.
Secondary damage includes warped flooring, ruined furniture, and black mold colonies behind walls. Remediation costs quickly exceed $5,000. Meanwhile, standing water triggers safety switches that shut down the heat pump entirely, leaving you without climate control during extreme weather.
Simple fix: Pour half a cup of white vinegar down the drain access port quarterly. Follow with a blast of compressed air from outside the termination point. Install a condensate overflow switch that alerts you via smartphone app before flooding occurs.
Age and Wear: Knowing When to Replace
All heat pumps eventually reach end-of-life. Industry standards expect 15-20 years of service with proper maintenance. Beyond that, repair frequency increases dramatically while efficiency declines steadily.
Consider replacement when:
- Repair costs exceed 50% of new unit price
- System uses R-22 refrigerant (phased out globally since 2020)
- Energy bills rise 20%+ compared to historical averages
- Noise levels increase significantly despite lubrication
- Temperature inconsistencies persist across multiple zones
New generation heat pumps deliver SEER ratings above 20, consuming 30-40% less electricity than decade-old models. Government rebates in New Zealand often offset installation costs. Calculate payback period based on annual energy savings-most homeowners recover investment within four to six years.
| Symptom | Probable Cause | Immediate Action | Professional Fix Required |
|---|---|---|---|
| Weak airflow | Clogged filter or blocked ductwork | Replace filter, inspect registers | Duct cleaning if problem persists |
| Ice on outdoor unit | Low refrigerant or airflow restriction | Turn off system, let ice melt | Leak detection and recharge |
| Loud banging noises | Loose panels or bearing failure | Tighten accessible screws | Motor or compressor inspection |
| Short cycling | Dirty coils or oversized unit | Clean condenser fins | Load calculation review |
| Water leakage indoors | Clogged drain line | Pour vinegar solution | Full drain line flushing |
Preventive Maintenance Checklist
Avoiding heat pump failure starts with consistent care. Follow this seasonal checklist to maximize reliability:
- Monthly: Inspect and replace air filters. Clear debris from around outdoor unit.
- Quarterly: Test thermostat calibration. Clean drain line with vinegar solution.
- Annually (spring): Schedule professional tune-up including coil cleaning, electrical checks, and refrigerant level verification.
- Annually (autumn): Inspect ductwork for leaks. Lubricate moving parts. Verify reversing valve operation.
- Every three years: Professional deep clean of evaporator and condenser coils. Electrical component testing.
Document all maintenance activities. Keep receipts for parts and labor. This record helps diagnose recurring issues and supports warranty claims. Many manufacturers void warranties if annual professional servicing isn’t documented.
How long does a heat pump last before needing replacement?
With proper maintenance, modern heat pumps typically last 15 to 20 years. Units installed before 2010 often use older technology and may require replacement sooner. Factors affecting lifespan include climate severity, usage patterns, and quality of annual servicing. If repair costs exceed half the price of a new unit, replacement usually makes financial sense.
What are the early warning signs of heat pump failure?
Watch for unusual noises (grinding, squealing, banging), reduced airflow from vents, longer run times to reach set temperatures, frequent cycling on and off, ice formation on outdoor coils, and sudden spikes in electricity bills. Addressing these symptoms early often prevents catastrophic component failure and saves significant repair costs.
Is it worth repairing an old heat pump or should I replace it?
Use the 50% rule: if repair costs exceed 50% of a new unit's price, replace instead. Also consider refrigerant type-R-22 systems require costly retrofits since production ended. New heat pumps offer 30-40% better efficiency, quieter operation, and smart controls. Calculate payback period based on annual energy savings; most homeowners recoup costs within four to six years.
How often should I change my heat pump air filter?
Standard fiberglass filters need replacement every 30 days during active heating or cooling seasons. Pleated media filters last 60-90 days. Homes with pets, smokers, or high dust exposure require more frequent changes. Always check filters monthly and replace when visibly dirty or when airflow noticeably decreases. Neglecting filters is the leading cause of premature heat pump failure.
Can I clean my heat pump coils myself?
Yes, you can gently rinse outdoor condenser coils with a garden hose once per year. Turn off power first, remove debris by hand, then spray from inside outward to avoid bending fins. Never use pressure washers or harsh chemicals. Indoor evaporator coils require professional cleaning every three years to ensure thorough sanitization and prevent mold growth.
Why is my heat pump making ice in summer?
Ice formation indicates either restricted airflow (dirty filters, blocked vents) or low refrigerant levels. Turn off the system immediately and let ice melt naturally-don’t chip it away. Replace filters, clear obstructions around the outdoor unit, then restart. If icing returns within hours, call a technician to check for refrigerant leaks or faulty fan motors.
What causes a heat pump to blow warm air in cooling mode?
First verify the thermostat is set to COOL, not HEAT. Check that the outdoor unit’s fan is running. If the reversing valve sticks in heating position, the system delivers warm air regardless of settings. Low refrigerant levels also reduce cooling capacity. Dirty condenser coils impair heat rejection. Have a technician test valve operation and refrigerant pressure if basic checks don’t resolve the issue.
How much does professional heat pump maintenance cost?
Annual tune-ups range from $150 to $300 depending on location and system complexity. Services typically include filter inspection, coil cleaning, electrical connection tightening, refrigerant level verification, and operational testing. While seemingly expensive, preventive maintenance avoids $1,000+ emergency repairs and extends equipment life by 3-5 years. Many companies offer multi-year service contracts at discounted rates.