Bathroom Extractor Fan Size Calculator
Bathroom Details
Results
Enter your bathroom size to get recommendations for the right extractor fan.
Replacing a bathroom extractor fan isn’t hard if you’ve done basic home repairs before-like changing a light switch or installing a shelf. But if you’ve never touched wiring or ceiling tiles, it can feel overwhelming. The truth? Most people can do it themselves in under two hours, with tools you probably already own. No electrician needed. No major renovation. Just a few smart steps and a bit of caution.
Why replace your extractor fan at all?
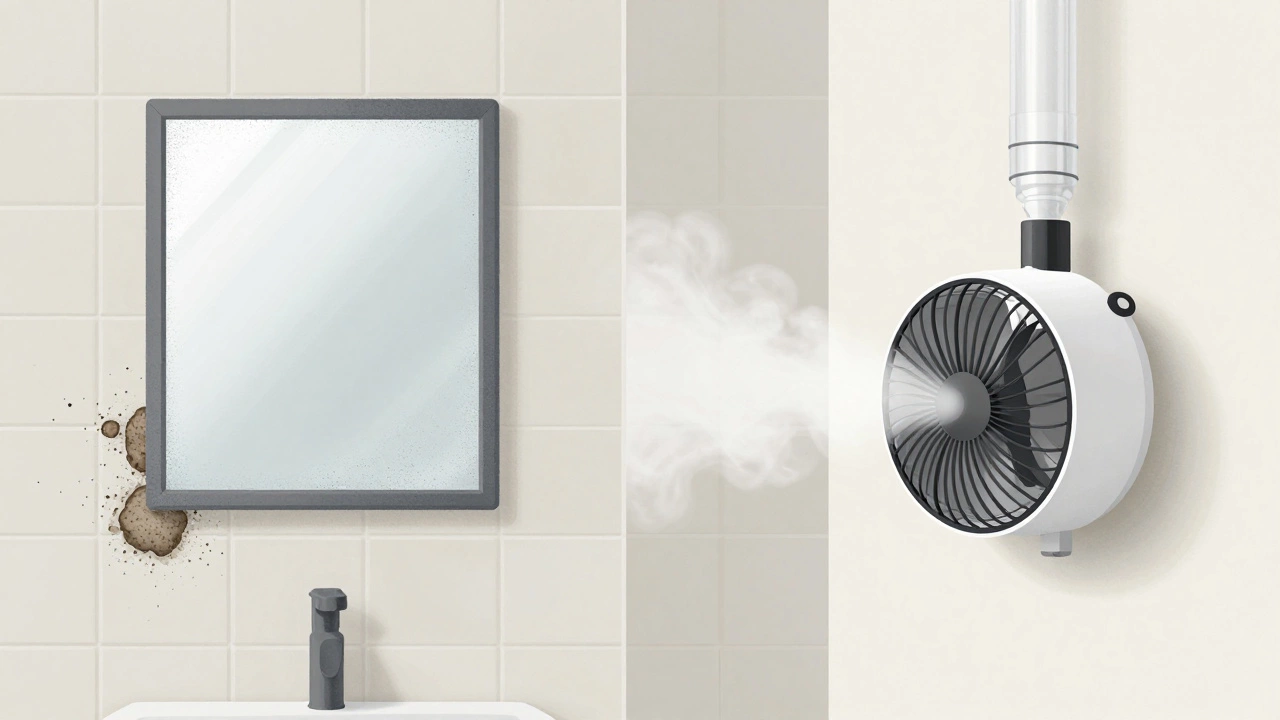
Old extractor fans don’t just get noisy-they stop working properly. If your bathroom still smells like damp after a shower, or the mirror stays fogged for 20 minutes, your fan isn’t pulling air out fast enough. That’s not just annoying. It’s a risk. Moisture builds up, and that leads to mold. Mold grows behind tiles, under floors, and inside walls. It’s not always visible until it’s too late. A working extractor fan removes humidity before it causes damage.
Modern fans are quieter, more efficient, and use up to 60% less power than models from 10 years ago. If your fan is older than 12 years, it’s likely underperforming. Even if it still spins, it might only move 15 liters of air per second when it should be moving 25. That’s not enough for a standard bathroom.
What tools and parts do you need?
You don’t need a professional toolkit. Here’s what you’ll actually use:
- Phillips screwdriver
- Flathead screwdriver
- Wire strippers (or pliers with a sharp edge)
- Voltage tester (non-contact, under $20)
- New extractor fan (match the size and airflow rating)
- Electrical tape
- Masking tape
- Step ladder or sturdy stool
Don’t skip the voltage tester. Even if you turned off the light switch, the fan might be wired to a different circuit. Test the wires before you touch them.
Step-by-step: How to replace the fan
- Turn off the power. Go to your circuit breaker and shut off the circuit that powers the bathroom. If you’re not sure which one, turn off the main breaker. Use your voltage tester on the fan’s wires to confirm there’s no current.
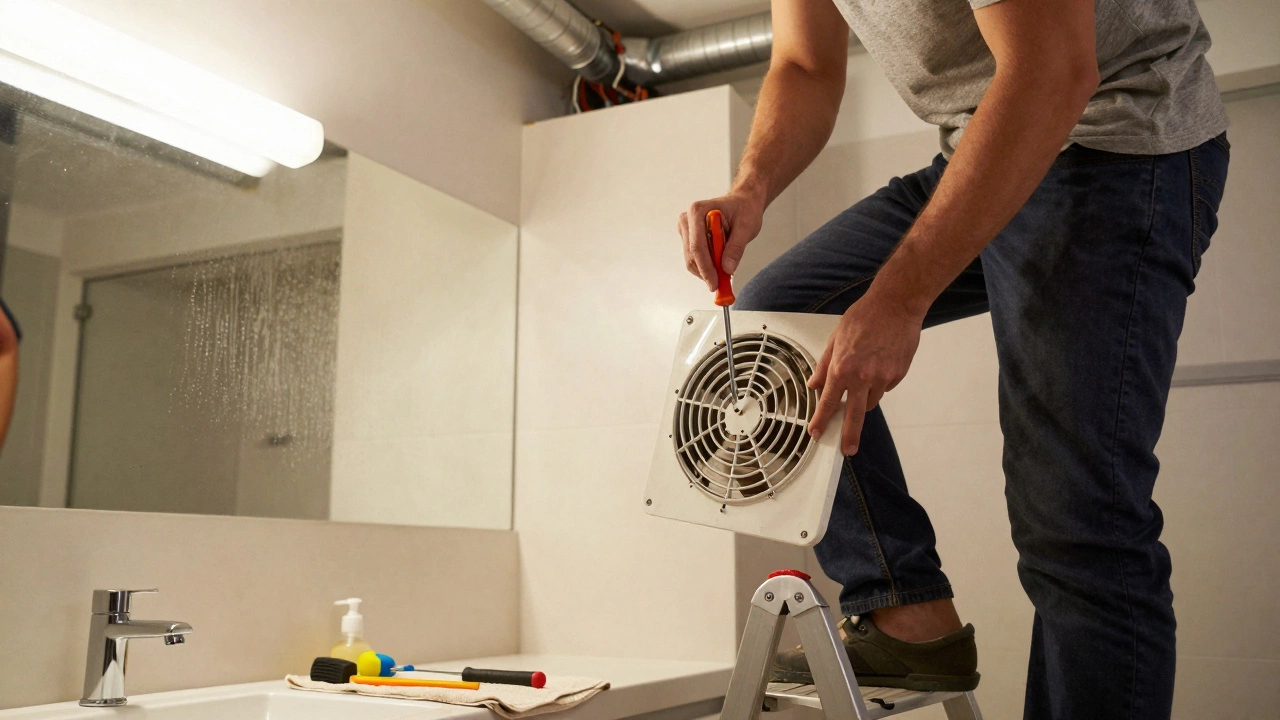
- Remove the old fan cover. Most covers snap off or are held by two or four screws. Take them off and set them aside. You’ll see the motor unit behind it, wired to the ceiling.
- Disconnect the wiring. Take a photo of the wire connections before you touch anything. You’ll see three wires: live (brown or red), neutral (blue or black), and earth (green/yellow). Unscrew the wire nuts or connectors and separate them.
- Remove the fan housing. The fan is usually held in place by spring clips or screws attached to the ceiling joists. Unscrew or release the clips. The unit might be heavy-hold it as you lower it.
- Check the duct. Look at the flexible duct connected to the back of the fan. Is it crushed? Kinked? Covered in dust? If it’s damaged, replace it. A blocked duct means even a new fan won’t work well.
- Install the new fan. Most new fans come with mounting brackets. Slide the new unit into place, secure it with screws or clips, and reconnect the duct. Make sure the airflow arrow on the fan points toward the outside.
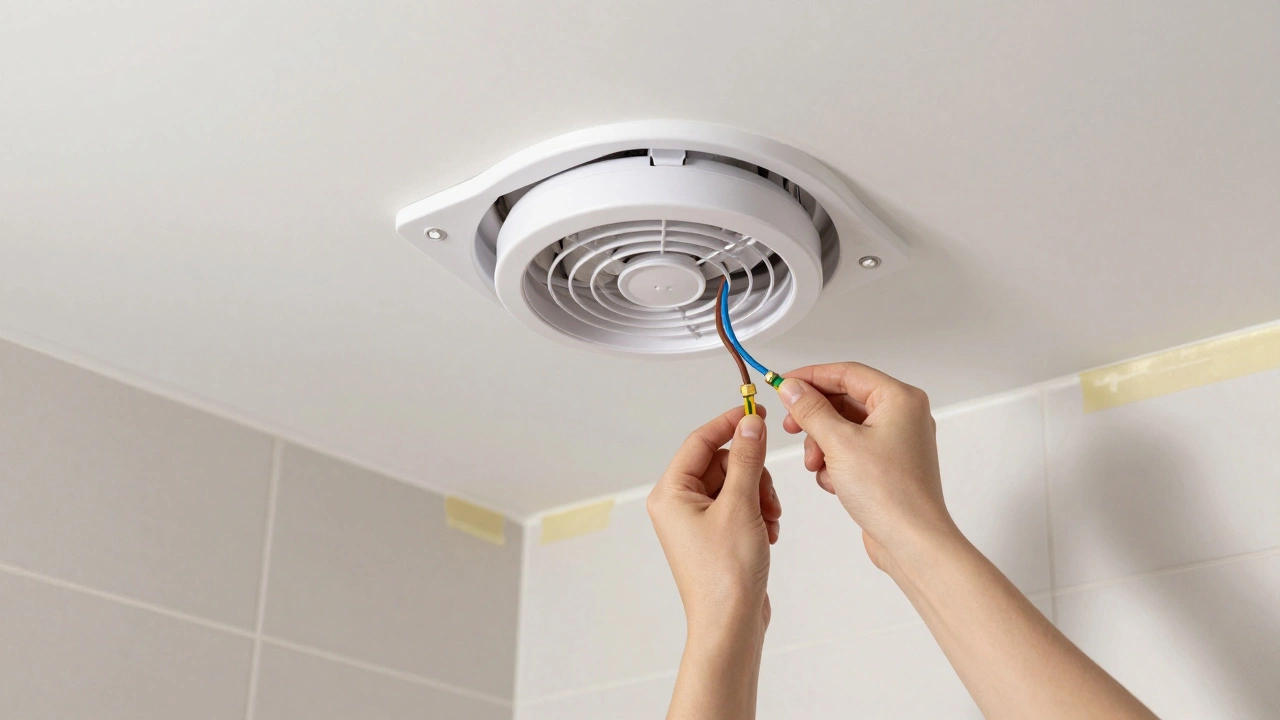
- Wire it up. Match the wires: brown to brown, blue to blue, green/yellow to green/yellow. Twist them together and cap with wire nuts. Wrap each connection with electrical tape for extra safety.
- Reattach the cover. Snap or screw the new cover back on. Turn the power back on and test the fan. It should start quietly and pull air out immediately.
What if the fan won’t turn on after replacement?
If the new fan doesn’t run, here’s what to check:
- Did you turn the power back on at the breaker?
- Are the wires connected correctly? Reversed live and neutral won’t stop it, but a loose connection will.
- Is the duct clear? A blocked duct can trigger safety cut-offs in newer models.
- Did you buy a fan with a humidity sensor? Some models won’t turn on unless the air is damp. Try spraying a little water near the sensor.
If you’ve checked all that and it still doesn’t work, the fan might be faulty. Most come with a 2-year warranty. Keep the receipt.
Choosing the right replacement fan
Don’t just grab the cheapest one. Match these three specs:
| Specification | What to Look For |
|---|---|
| Size (mm) | Measure the cut-out hole in your ceiling. Most are 150mm or 200mm. New fans often come with adapter rings. |
| Airflow (L/s) | For a small bathroom (under 5m²), aim for 15-20 L/s. For larger bathrooms, go 25-30 L/s. Check the label on your old fan. |
| Noise level (dB) | Anything under 30 dB is whisper-quiet. Avoid fans above 40 dB-they sound like a vacuum cleaner. |
Look for fans with built-in timers or humidity sensors. They turn on automatically when you shower and run for 10-20 minutes after you leave. That’s more effective than flipping a switch every time.
When to call a professional
You don’t need an electrician for a simple swap. But call one if:
- The wiring looks old, frayed, or aluminum (not copper)
- The duct runs through the roof and you’re not sure how to seal it
- You’re replacing a fan in a rental property and your landlord requires licensed work
- You feel unsure about handling live wires, even after testing
In New Zealand, electrical work in bathrooms must comply with AS/NZS 3000. If you’re not confident, it’s cheaper and safer to hire someone than to risk a shock or fire.
How long does a new fan last?
Good quality fans last 10-15 years with minimal maintenance. Cheaper ones might fail in 5. Look for brands like Vent-Axia, Xpelair, or Manrose-they’re common in New Zealand homes and have solid support networks. Clean the cover every 6 months with a damp cloth. Dust buildup slows airflow and strains the motor.
Don’t wait for the fan to die completely. If it’s humming louder than usual, taking longer to clear steam, or vibrating more than before-it’s time to replace it. Fixing it early saves you from mold, ceiling stains, and higher power bills.
What about ductless fans?
Some people think ductless fans (recirculating models with charcoal filters) are easier. They are-no ductwork needed. But they don’t remove moisture. They only filter odors. That means humidity stays in the room. In a humid climate like Wellington, that’s a recipe for mold. Avoid them for bathrooms. Always go for a fan that vents to the outside.
Final tip: Test it before you finish
Before you clean up, run the fan for 5 minutes. Hold a piece of tissue paper near the grille. It should pull firmly inward. If it doesn’t, check the duct connection. If it’s loose or crimped, the fan won’t work right. A good installation means no whistling, no rattling, and no dampness on the walls a day later.
Replacing your bathroom extractor fan is one of those home fixes that makes a bigger difference than you expect. It’s quiet, it’s cheap, and it protects your home. You don’t need to be a handyman to do it. Just take your time, stay safe, and trust the process.
Can I replace a bathroom extractor fan myself?
Yes, most people can replace a bathroom extractor fan themselves if they’re comfortable using basic tools and turning off power at the breaker. No electrician is needed for a direct swap of the same size and type. Just make sure the power is off, wires are matched correctly, and the duct is clear.
How much does it cost to replace a bathroom extractor fan?
A new fan costs between $60 and $180, depending on features like timers or humidity sensors. If you do it yourself, that’s your only cost. Hiring an electrician adds $150-$250 for labor. Most DIY replacements take under two hours.
Do I need to replace the duct when replacing the fan?
Not always, but you should check it. If the duct is crushed, kinked, covered in dust, or made of old flexible plastic, replace it. A blocked or damaged duct reduces airflow by up to 50%, making even a new fan ineffective. Use rigid aluminum ducting for best results.
Why is my new fan noisy after installation?
Noise usually comes from a loose duct connection, an unsecured fan housing, or a bent mounting bracket. Turn off the power and check that all screws are tight and the fan is seated flat against the ceiling. Also, make sure the duct isn’t touching any nearby timber or insulation-vibrations can transfer and cause rattling.
Are extractor fans required by law in New Zealand bathrooms?
Yes. Under the New Zealand Building Code (Clause G12), all bathrooms must have adequate ventilation. This means either a window with at least 5% of the floor area or a mechanical extractor fan that vents to the outside. A fan is the most reliable and common solution.
What to do next
If your fan is old, noisy, or not clearing steam, don’t wait. Start by measuring the cut-out hole in your ceiling and checking the airflow rating on the old unit. Buy a new fan with similar specs and a timer function. Do it on a weekend when you have time. Turn off the power. Take photos. Replace it. Then, enjoy a bathroom that stays dry, clean, and odor-free.